Small snacks. Big practical help.
Some days, hunger does not arrive politely at the perfect time. It shows up between meetings, in the car, after school pickup, or right before you start making dinner.
That is where these packable snacks under 400 kcal can help. They are simple, realistic, and easy to take with you, so you have something balanced on hand instead of relying on whatever happens to be nearby.
Quick answer
These 7 packable snacks under 400 kcal are designed for work, errands, school runs, travel days, or busy afternoons. Each snack is portable, made with accessible ingredients, and includes estimated calories per serving. Most are no-cook or low-cook, with practical storage notes so they hold up well in a lunchbox.
Why you’ll love this
- They are easy to prep without turning snack time into a project.
- Each idea includes protein, fiber, or healthy fats for better staying power.
- They are portable enough for work, errands, or a packed lunch.
Roundup at a glance
| Recipe | Best for | Prep time | Cook time | Estimated kcal per serving |
|---|---|---|---|---|
| Turkey Cheddar Apple Protein Box | Savory-sweet work snack | 10 minutes | 0 minutes | 328 kcal |
| Greek Yogurt Berry Oat Jar | Cold breakfast-style snack | 5 minutes | 0 minutes | 282 kcal |
| Egg Hummus Veggie Wrap | Filling savory snack | 10 minutes | 10 minutes | 335 kcal |
| Peanut Butter Banana Rice Cake Stack | Sweet crunchy snack | 5 minutes | 0 minutes | 278 kcal |
| Cottage Cheese Pita Snack Box | High-protein lunchbox snack | 8 minutes | 0 minutes | 318 kcal |
| Tuna Corn Cucumber Cups | Fresh savory snack | 10 minutes | 0 minutes | 266 kcal |
| Mini Chicken Avocado Tortilla Roll-Ups | Meal-prep savory snack | 12 minutes | 0 minutes | 371 kcal |
Calorie estimates are approximate and will vary depending on brands, exact ingredient weights, and portioning.
Recipe 1: Turkey Cheddar Apple Protein Box
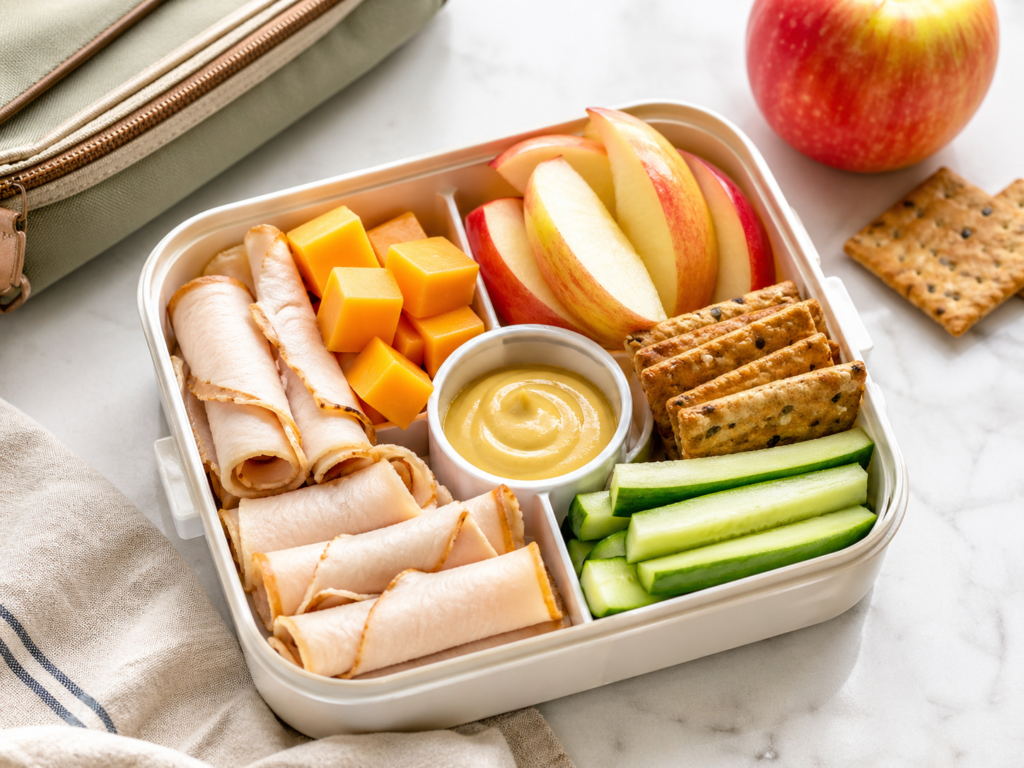
This snack box is a good choice when you want something savory, crisp, and slightly sweet. It feels more like a mini meal than a random snack, but it still stays comfortably under 400 kcal.
Recipe at a glance
- Prep time: 10 minutes
- Cook time: 0 minutes
- Total time: 10 minutes
- Servings: 1
- Estimated kcal per serving: 328 kcal
Ingredients
| Ingredient | Metric quantity | Imperial quantity | Estimated kcal for listed amount | Notes / swaps |
|---|---|---|---|---|
| Sliced turkey breast | 60 g | 2 oz | 70 kcal | Use roasted chicken slices if preferred. |
| Cheddar cheese | 20 g | 0.7 oz | 80 kcal | Choose reduced-fat cheddar to lower calories. |
| Apple | 150 g | 1 medium apple | 78 kcal | Slice just before packing or add lemon juice. |
| Whole grain crackers | 20 g | About 6 small crackers | 85 kcal | Use crispbread for a lighter option. |
| Cucumber | 80 g | ½ cup sliced | 12 kcal | Bell pepper strips also work well. |
| Dijon mustard | 5 g | 1 teaspoon | 3 kcal | Optional for dipping turkey slices. |
Total estimated kcal for the whole recipe: 328 kcal
Estimated kcal per serving: 328 kcal
Equipment needed
- Small lunchbox or divided container
- Knife
- Cutting board
- Small dip cup
How to make it
- Slice the apple into thin wedges for 2 minutes, then pat the slices dry with a paper towel so they do not make the crackers soft.
- Cut the cheddar into small cubes or thin slices for 1 minute, making the pieces easy to pick up.
- Roll or fold the turkey slices for 1 minute so they fit neatly in the container.
- Slice the cucumber into rounds or sticks for 2 minutes, keeping the pieces firm and dry.
- Add the mustard to a small dip cup for 30 seconds, then close the lid tightly.
- Arrange the turkey, cheddar, apple, crackers, cucumber, and mustard in separate sections for 2 minutes. Keep the crackers away from moist ingredients so they stay crisp.
Tips for best results
- Pack crackers in a separate small bag if you will eat this more than 4 hours later.
- Use a firm apple variety so the slices hold their texture.
- Add a squeeze of lemon to apple slices if browning bothers you.
- Keep the cheese cold with an ice pack if packing for work or travel.
Easy swaps and variations
- Swap turkey for chicken, lean ham, or smoked tofu slices.
- Swap cheddar for mozzarella, Gouda, or a mini cheese portion.
- Use pear slices instead of apple for a softer, sweeter version.
- Add cherry tomatoes if you want more volume for very few calories.
Storage and meal-prep notes
Store in the fridge for up to 24 hours. For the freshest texture, slice the apple the same morning. Do not freeze this snack box. No reheating is needed.
What to serve with it
This snack is filling on its own. If you need a more substantial lunchbox, pair it with a small side salad, vegetable soup, or a light yogurt.
Nutrition estimate
- Total kcal: 328 kcal
- Kcal per serving: 328 kcal
- Rough protein: 21 g
- Rough carbs: 35 g
- Rough fat: 12 g
Nutrition values are estimates and can vary by brand, ingredient size, and exact portioning.
Recipe 2: Greek Yogurt Berry Oat Jar
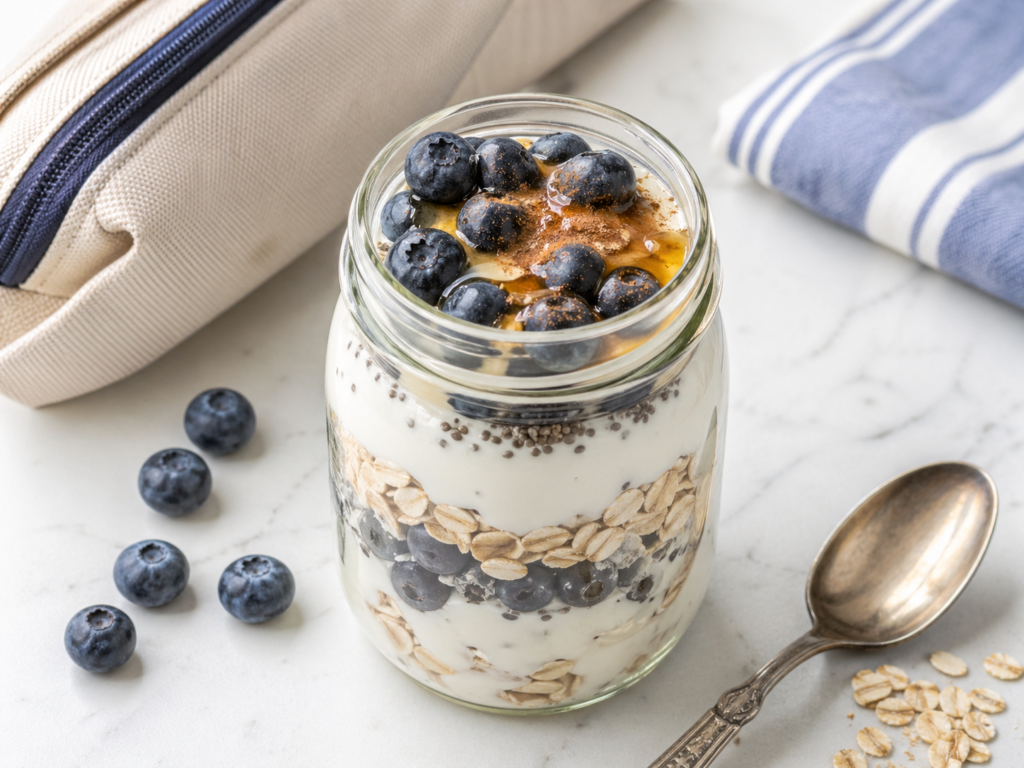
This cold jar snack is creamy, fruity, and easy to prepare in the morning or the night before. The oats and chia help it feel more satisfying than plain yogurt alone.
Recipe at a glance
- Prep time: 5 minutes
- Cook time: 0 minutes
- Total time: 5 minutes
- Servings: 1
- Estimated kcal per serving: 282 kcal
Ingredients
| Ingredient | Metric quantity | Imperial quantity | Estimated kcal for listed amount | Notes / swaps |
|---|---|---|---|---|
| Plain Greek yogurt, 0–2% | 170 g | ¾ cup | 100 kcal | Use thick yogurt for best texture. |
| Rolled oats | 20 g | ¼ cup | 76 kcal | Quick oats create a softer texture. |
| Blueberries | 80 g | ½ cup | 46 kcal | Fresh or frozen berries both work. |
| Chia seeds | 8 g | 2 teaspoons | 39 kcal | Helps thicken the jar. |
| Honey | 7 g | 1 teaspoon | 21 kcal | Maple syrup also works. |
| Cinnamon | 1 g | ½ teaspoon | 0 kcal | Optional but adds warmth. |
Total estimated kcal for the whole recipe: 282 kcal
Estimated kcal per serving: 282 kcal
Equipment needed
- Small jar with lid
- Spoon
- Measuring spoon
How to make it
- Spoon the Greek yogurt into a clean jar for 30 seconds, spreading it evenly across the bottom.
- Add the rolled oats and chia seeds for 30 seconds, then stir until no dry patches remain.
- Drizzle in the honey and sprinkle the cinnamon over the top for 30 seconds.
- Fold in half of the blueberries for 1 minute, stirring gently so the yogurt stays thick.
- Add the remaining blueberries on top for 30 seconds, pressing them lightly into the yogurt.
- Close the lid and chill for at least 30 minutes if possible. The jar is ready when the oats look softened and the mixture is slightly thicker.
Tips for best results
- Make it the night before for the softest oat texture.
- Use a wide-mouth jar so it is easy to eat with a spoon.
- Keep the honey light if your berries are naturally sweet.
- Add a splash of milk only if the yogurt is very thick.
Easy swaps and variations
- Use raspberries, strawberries, or diced peach instead of blueberries.
- Add vanilla extract for a dessert-like flavor.
- Swap honey for maple syrup.
- Use lactose-free yogurt if needed.
Storage and meal-prep notes
Store covered in the fridge for up to 2 days. The texture gets thicker as it sits. Do not freeze. Keep chilled until ready to eat.
What to serve with it
This works well as a mid-morning snack. For a more filling lunchbox, pair it with boiled eggs, a simple sandwich half, or raw vegetables.
Nutrition estimate
- Total kcal: 282 kcal
- Kcal per serving: 282 kcal
- Rough protein: 20 g
- Rough carbs: 39 g
- Rough fat: 6 g
Nutrition values are estimates and can vary by brand, ingredient size, and exact portioning.
Recipe 3: Egg Hummus Veggie Wrap
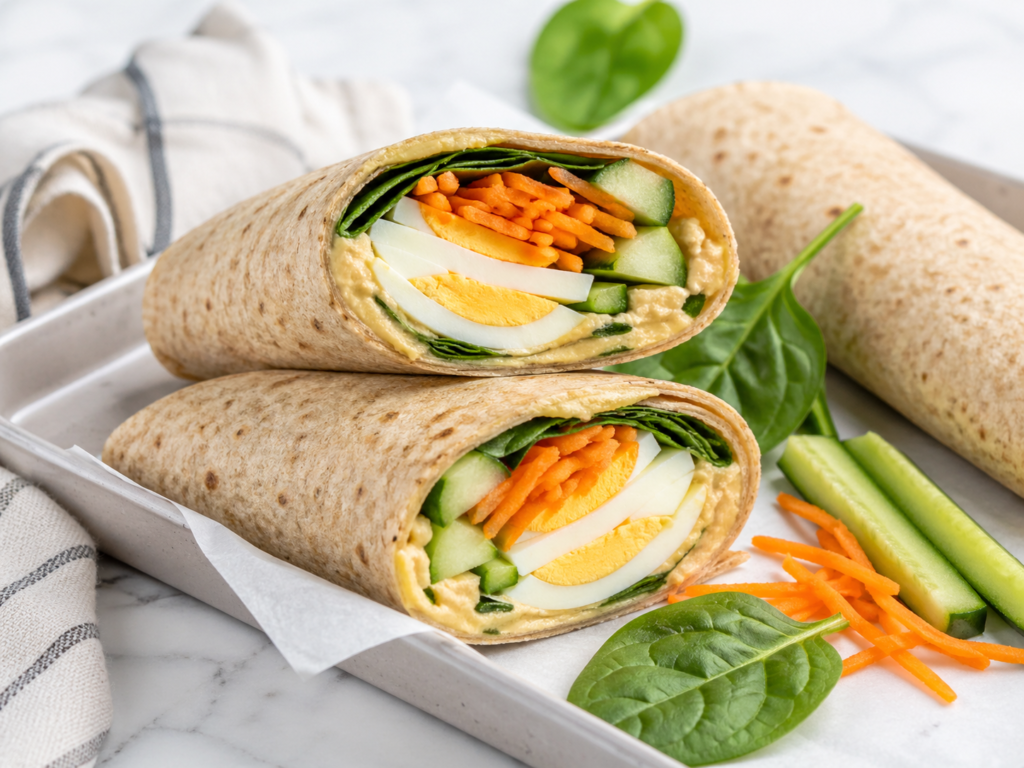
This wrap is compact, colorful, and satisfying enough for days when a small snack will not do. The hummus adds creaminess, while the egg gives it a simple protein boost.
Recipe at a glance
- Prep time: 10 minutes
- Cook time: 10 minutes
- Total time: 20 minutes
- Servings: 1
- Estimated kcal per serving: 335 kcal
Ingredients
| Ingredient | Metric quantity | Imperial quantity | Estimated kcal for listed amount | Notes / swaps |
|---|---|---|---|---|
| Whole wheat tortilla | 45 g | 1 medium tortilla | 135 kcal | Use a lower-calorie wrap if preferred. |
| Large egg | 50 g | 1 large egg | 72 kcal | Boiled egg works best for packing. |
| Hummus | 35 g | 2 tablespoons | 95 kcal | Use plain or roasted red pepper hummus. |
| Baby spinach | 20 g | 1 cup loosely packed | 5 kcal | Pat dry before adding. |
| Carrot | 50 g | ½ medium carrot, grated | 20 kcal | Adds crunch and sweetness. |
| Cucumber | 50 g | ⅓ cup thin sticks | 8 kcal | Remove watery seeds if needed. |
Total estimated kcal for the whole recipe: 335 kcal
Estimated kcal per serving: 335 kcal
Equipment needed
- Small saucepan
- Bowl of cold water
- Knife
- Cutting board
- Grater
- Foil or parchment paper
How to make it
- Place the egg in a small saucepan and cover it with cold water by about 2.5 cm / 1 inch.
- Bring the water to a gentle boil over medium-high heat for 5–6 minutes, then reduce the heat to medium.
- Simmer the egg for 9 minutes. The egg is ready when the white is fully set and the yolk is firm but not dry.
- Transfer the egg to cold water for 3 minutes, then peel it and slice it into thin rounds.
- Lay the tortilla flat and spread the hummus evenly over the center for 1 minute, leaving a small border around the edge.
- Add the spinach, grated carrot, cucumber sticks, and sliced egg in a line down the middle for 2 minutes.
- Fold the sides inward, then roll the wrap tightly from the bottom for 1 minute. The wrap should feel firm but not overstuffed.
- Wrap it in parchment or foil and rest it seam-side down for 2 minutes before packing.
Tips for best results
- Pat cucumber dry so the wrap does not become soggy.
- Keep the filling in the center so the tortilla rolls cleanly.
- Use a fresh, flexible tortilla to prevent cracking.
- Slice the wrap in half only when ready to eat.
Easy swaps and variations
- Swap egg for cooked chicken, tofu strips, or turkey slices.
- Use tzatziki instead of hummus for a lighter, tangy version.
- Add pickled onions for extra flavor.
- Use spinach, romaine, or shredded lettuce.
Storage and meal-prep notes
Store wrapped in foil or parchment in the fridge for up to 24 hours. Keep chilled with an ice pack if taking it to work. Do not freeze. Eat cold or bring to room temperature for 10 minutes before eating.
What to serve with it
Pair with cherry tomatoes, grapes, or a small cup of soup if you want to turn it into a light lunch.
Nutrition estimate
- Total kcal: 335 kcal
- Kcal per serving: 335 kcal
- Rough protein: 16 g
- Rough carbs: 38 g
- Rough fat: 14 g
Nutrition values are estimates and can vary by brand, ingredient size, and exact portioning.
Recipe 4: Peanut Butter Banana Rice Cake Stack
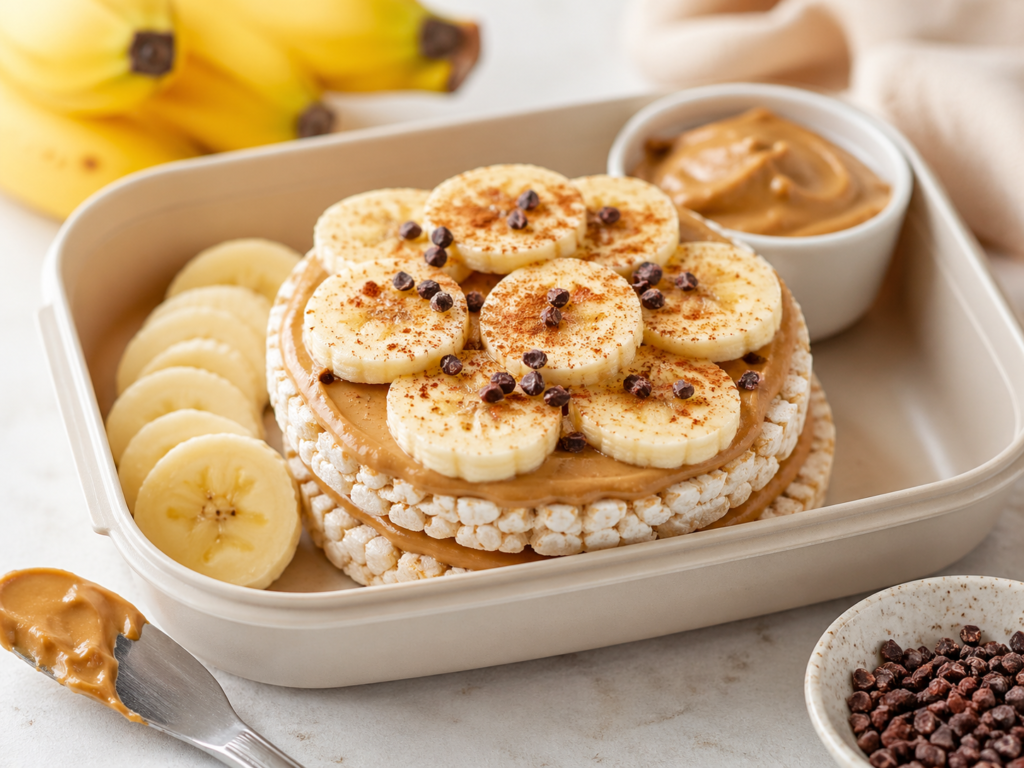
This is the snack to pack when you want something sweet, crunchy, and quick. It gives you the peanut butter and banana combination without needing bread or cooking.
Recipe at a glance
- Prep time: 5 minutes
- Cook time: 0 minutes
- Total time: 5 minutes
- Servings: 1
- Estimated kcal per serving: 278 kcal
Ingredients
| Ingredient | Metric quantity | Imperial quantity | Estimated kcal for listed amount | Notes / swaps |
|---|---|---|---|---|
| Plain rice cakes | 18 g | 2 rice cakes | 70 kcal | Use corn cakes if preferred. |
| Peanut butter | 24 g | 1½ tablespoons | 141 kcal | Almond butter also works. |
| Banana | 70 g | ½ medium banana | 62 kcal | Slice just before eating if possible. |
| Cinnamon | 1 g | ½ teaspoon | 0 kcal | Optional. |
| Pinch of flaky salt | 0.5 g | Small pinch | 0 kcal | Optional, but balances sweetness. |
| Cocoa nibs or mini dark chocolate chips | 2 g | ½ teaspoon | 5 kcal | Optional topping. |
Total estimated kcal for the whole recipe: 278 kcal
Estimated kcal per serving: 278 kcal
Equipment needed
- Small container
- Butter knife
- Small snack bag
- Knife
How to make it
- Pack the rice cakes in a separate snack bag for 30 seconds so they stay crisp.
- Spoon the peanut butter into a small sealed container for 30 seconds.
- Slice the banana into coins for 1 minute if eating soon. If packing for later, keep the banana whole and slice it when ready.
- Spread the peanut butter over the rice cakes for 1 minute when ready to eat, covering the surface in a thin, even layer.
- Add the banana slices on top for 1 minute, slightly overlapping them so each bite has fruit.
- Sprinkle with cinnamon, salt, and cocoa nibs for 30 seconds. The snack is ready when the rice cakes are still crisp and the toppings sit securely.
Tips for best results
- Assemble right before eating to keep the rice cakes crunchy.
- Use a firm banana if packing for several hours.
- Measure peanut butter once or twice until you know what the portion looks like.
- Add cinnamon for sweetness without adding much energy.
Easy swaps and variations
- Swap peanut butter for almond butter, cashew butter, or sunflower seed butter.
- Use apple slices instead of banana.
- Add a few crushed freeze-dried berries.
- Use chocolate rice cakes if you want a sweeter version.
Storage and meal-prep notes
Pack the components separately for best texture. Rice cakes can be kept at room temperature. Peanut butter can be packed in a small sealed cup. Assemble within 5 minutes of eating.
What to serve with it
For more protein, pair with Greek yogurt, a boiled egg, or a small protein milk. Keep the add-on modest if you want the full snack to stay near 400 kcal.
Nutrition estimate
- Total kcal: 278 kcal
- Kcal per serving: 278 kcal
- Rough protein: 8 g
- Rough carbs: 32 g
- Rough fat: 14 g
Nutrition values are estimates and can vary by brand, ingredient size, and exact portioning.
Recipe 5: Cottage Cheese Pita Snack Box
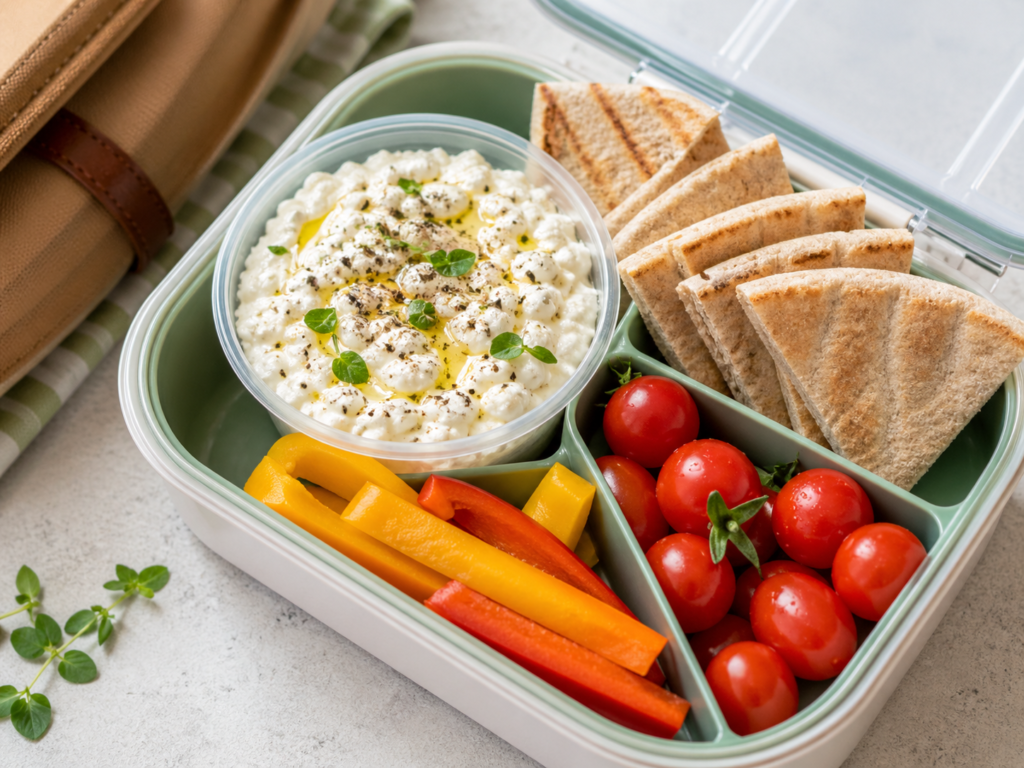
This snack box is cool, creamy, crunchy, and very easy to pack. It works especially well when you want something savory that takes less than 10 minutes.
Recipe at a glance
- Prep time: 8 minutes
- Cook time: 0 minutes
- Total time: 8 minutes
- Servings: 1
- Estimated kcal per serving: 318 kcal
Ingredients
| Ingredient | Metric quantity | Imperial quantity | Estimated kcal for listed amount | Notes / swaps |
|---|---|---|---|---|
| Low-fat cottage cheese | 150 g | ⅔ cup | 120 kcal | Use thicker cottage cheese for dipping. |
| Mini whole wheat pita | 40 g | 1 mini pita | 110 kcal | Cut into wedges. |
| Cherry tomatoes | 100 g | ¾ cup | 18 kcal | Keep whole for less moisture. |
| Bell pepper | 80 g | ½ medium pepper | 25 kcal | Any color works. |
| Olive oil | 5 g | 1 teaspoon | 45 kcal | Stir into cottage cheese or drizzle over veg. |
| Black pepper and dried herbs | 1 g | ½ teaspoon | 0 kcal | Use dill, oregano, or chives. |
Total estimated kcal for the whole recipe: 318 kcal
Estimated kcal per serving: 318 kcal
Equipment needed
- Lunchbox
- Small dip container
- Knife
- Cutting board
- Spoon
How to make it
- Spoon the cottage cheese into a small sealed container for 1 minute.
- Stir in black pepper and dried herbs for 30 seconds, mixing until the herbs are evenly spread.
- Drizzle in the olive oil for 15 seconds, then stir lightly so the surface looks glossy but not oily.
- Cut the mini pita into wedges for 1 minute.
- Slice the bell pepper into sticks for 2 minutes, removing the stem, seeds, and white ribs.
- Add cherry tomatoes, pepper sticks, pita wedges, and cottage cheese to the lunchbox for 2 minutes, keeping the pita away from wet ingredients.
Tips for best results
- Keep pita separate until eating so it stays soft, not soggy.
- Use a cottage cheese brand you enjoy because the flavor is central here.
- Add herbs generously for a more savory taste.
- Keep the tomatoes whole if packing the snack for later.
Easy swaps and variations
- Swap cottage cheese for thick Greek yogurt dip.
- Use cucumber sticks instead of bell pepper.
- Add a pinch of chili flakes for heat.
- Use crispbread instead of pita for more crunch.
Storage and meal-prep notes
Store in the fridge for up to 24 hours. Keep chilled with an ice pack. Do not freeze. No reheating is needed.
What to serve with it
This snack can become a light lunch with a boiled egg, a piece of fruit, or a small cup of lentil-free vegetable soup.
Nutrition estimate
- Total kcal: 318 kcal
- Kcal per serving: 318 kcal
- Rough protein: 22 g
- Rough carbs: 32 g
- Rough fat: 11 g
Nutrition values are estimates and can vary by brand, ingredient size, and exact portioning.
Recipe 6: Tuna Corn Cucumber Cups
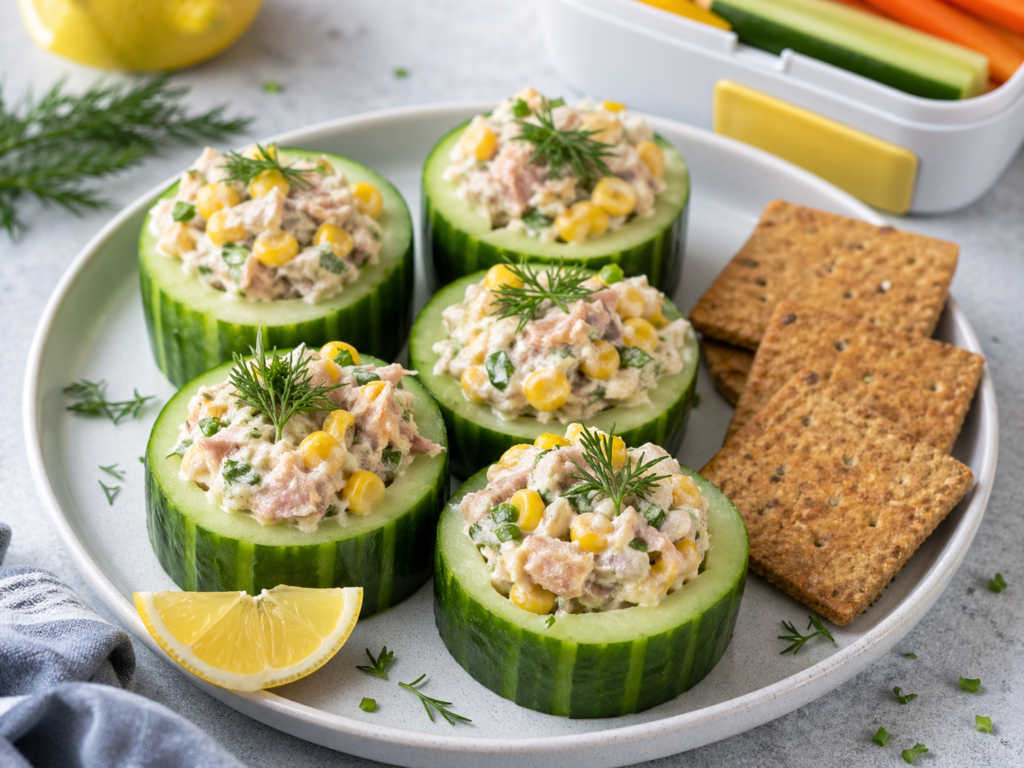
These cucumber cups are fresh, light, and surprisingly satisfying. They are best when you want a savory snack that feels crisp instead of heavy.
Recipe at a glance
- Prep time: 10 minutes
- Cook time: 0 minutes
- Total time: 10 minutes
- Servings: 1
- Estimated kcal per serving: 266 kcal
Ingredients
| Ingredient | Metric quantity | Imperial quantity | Estimated kcal for listed amount | Notes / swaps |
|---|---|---|---|---|
| Tuna in water, drained | 100 g | 3.5 oz | 116 kcal | Use canned salmon or chicken if preferred. |
| Sweet corn, drained | 50 g | ⅓ cup | 43 kcal | Use canned or thawed frozen corn. |
| Greek yogurt | 40 g | 2½ tablespoons | 24 kcal | Replaces heavier mayo. |
| Light mayonnaise | 10 g | 2 teaspoons | 35 kcal | Adds creaminess; optional. |
| Cucumber | 200 g | 1 large cucumber | 30 kcal | Choose a firm cucumber. |
| Lemon juice | 10 g | 2 teaspoons | 3 kcal | Brightens the tuna mix. |
| Fresh dill or parsley | 5 g | 1 tablespoon chopped | 2 kcal | Optional but recommended. |
| Whole grain crackers | 15 g | About 4 small crackers | 63 kcal | Serve on the side for crunch. |
Total estimated kcal for the whole recipe: 266 kcal
Estimated kcal per serving: 266 kcal
Equipment needed
- Mixing bowl
- Spoon
- Knife
- Cutting board
- Paper towel
- Lunchbox
How to make it
- Drain the tuna well for 1 minute, pressing out extra liquid with the lid or a fork until it looks flaky, not watery.
- Add tuna, corn, Greek yogurt, light mayonnaise, lemon juice, and herbs to a bowl for 1 minute.
- Stir the mixture for 1 minute until the tuna is evenly coated and the corn is spread throughout.
- Cut the cucumber into thick rounds, about 2.5 cm / 1 inch each, for 2 minutes.
- Scoop a shallow dip from the center of each cucumber round for 2 minutes, leaving the base intact so it can hold filling.
- Pat the cucumber cups dry with a paper towel for 30 seconds.
- Spoon the tuna mixture into the cucumber cups for 2 minutes. The cups are ready when the filling sits neatly without sliding off.
- Pack crackers separately for crunch.
Tips for best results
- Drain tuna very well to prevent watery filling.
- Use thick cucumber rounds so the cups stay sturdy.
- Assemble close to eating time for the crispest texture.
- Keep crackers separate until serving.
Easy swaps and variations
- Swap corn for diced bell pepper.
- Use canned salmon instead of tuna.
- Add a little mustard for sharper flavor.
- Serve the tuna mix in lettuce cups instead of cucumber cups.
Storage and meal-prep notes
Store the tuna mixture in a sealed container in the fridge for up to 2 days. Cut cucumber the day you plan to eat it. Assemble within a few hours for best texture. Do not freeze.
What to serve with it
Serve with crackers, a small piece of fruit, or extra raw vegetables. For a more filling meal, add a mini pita or a small side salad.
Nutrition estimate
- Total kcal: 266 kcal
- Kcal per serving: 266 kcal
- Rough protein: 28 g
- Rough carbs: 24 g
- Rough fat: 7 g
Nutrition values are estimates and can vary by brand, ingredient size, and exact portioning.
Recipe 7: Mini Chicken Avocado Tortilla Roll-Ups
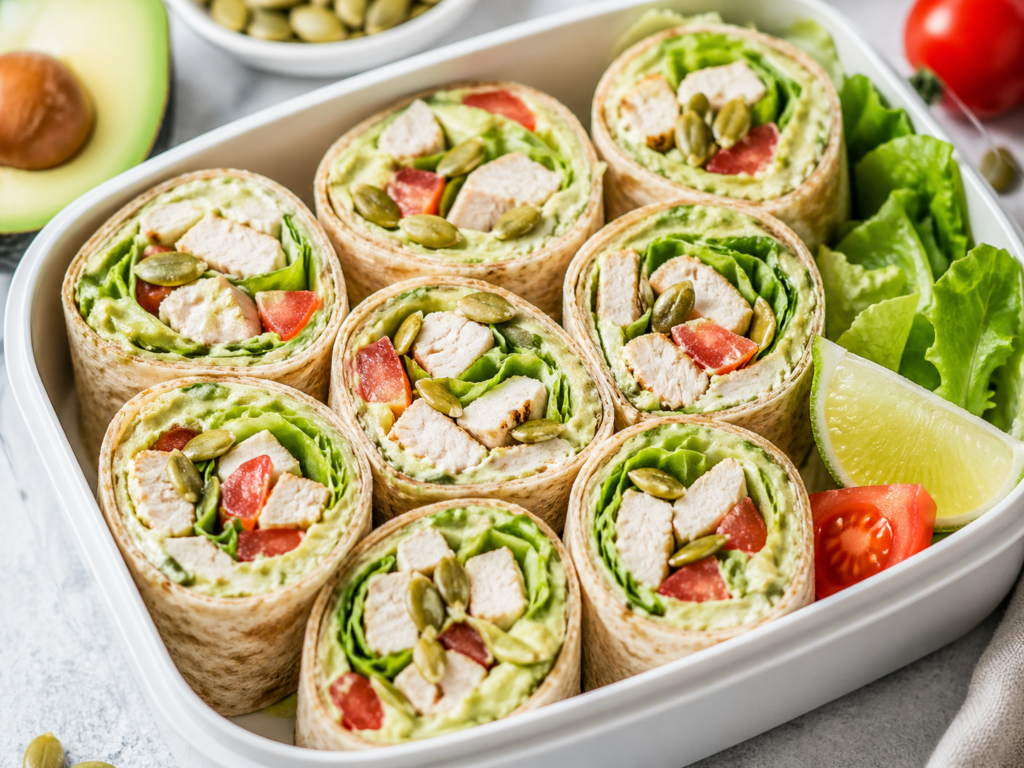
These roll-ups are small, neat, and easy to eat without a plate. They are ideal when you need a portable snack that feels more satisfying than a bar or a handful of crackers.
Recipe at a glance
- Prep time: 12 minutes
- Cook time: 0 minutes
- Total time: 12 minutes
- Servings: 1
- Estimated kcal per serving: 371 kcal
Ingredients
| Ingredient | Metric quantity | Imperial quantity | Estimated kcal for listed amount | Notes / swaps |
|---|---|---|---|---|
| Whole wheat tortilla | 45 g | 1 medium tortilla | 135 kcal | Use a soft tortilla for easy rolling. |
| Cooked chicken breast | 70 g | 2.5 oz | 116 kcal | Rotisserie chicken breast works if skin is removed. |
| Avocado | 40 g | ¼ medium avocado | 64 kcal | Mash with lime to prevent browning. |
| Greek yogurt | 20 g | 1 tablespoon | 12 kcal | Makes the avocado creamier. |
| Romaine lettuce | 25 g | 1 large leaf, shredded | 4 kcal | Adds crunch. |
| Tomato | 50 g | ½ small tomato | 9 kcal | Remove seeds to reduce moisture. |
| Lime juice | 10 g | 2 teaspoons | 3 kcal | Helps keep avocado fresh. |
| Pumpkin seeds | 5 g | 1 teaspoon | 28 kcal | Optional crunch. |
Total estimated kcal for the whole recipe: 371 kcal
Estimated kcal per serving: 371 kcal
Equipment needed
- Bowl
- Fork
- Knife
- Cutting board
- Parchment paper or foil
How to make it
- Add the avocado, Greek yogurt, and lime juice to a small bowl for 1 minute.
- Mash with a fork for 1 minute until the mixture looks mostly smooth with a few small avocado pieces.
- Chop the cooked chicken into small pieces for 2 minutes so the roll-up slices cleanly.
- Dice the tomato for 1 minute, then remove extra seeds and juice so the tortilla stays firm.
- Lay the tortilla flat and spread the avocado mixture across the center for 1 minute, leaving a small border.
- Add chicken, lettuce, tomato, and pumpkin seeds in an even layer for 2 minutes.
- Roll the tortilla tightly from the bottom for 1 minute, pressing gently as you roll so the filling stays inside.
- Wrap in parchment and rest seam-side down for 3 minutes.
- Slice into 4–6 mini roll-ups with a sharp knife. The pieces are ready when the filling holds in a spiral and does not spill out.
Tips for best results
- Use cold cooked chicken so the wrap stays firm.
- Remove wet tomato seeds before rolling.
- Do not overfill the tortilla, or the roll-ups will open.
- Wrap tightly and let it rest before slicing.
Easy swaps and variations
- Swap chicken for turkey, tuna, or baked tofu.
- Use spinach instead of romaine.
- Add a little hot sauce to the avocado spread.
- Skip pumpkin seeds if you want a softer texture.
Storage and meal-prep notes
Store tightly wrapped in the fridge for up to 24 hours. For best color, press parchment directly against cut sides if storing sliced roll-ups. Do not freeze. Eat cold.
What to serve with it
Serve with cucumber sticks, cherry tomatoes, or a small fruit portion. If using it as a light lunch, add a simple salad or broth-based soup.
Nutrition estimate
- Total kcal: 371 kcal
- Kcal per serving: 371 kcal
- Rough protein: 28 g
- Rough carbs: 32 g
- Rough fat: 15 g
Nutrition values are estimates and can vary by brand, ingredient size, and exact portioning.
Final practical takeaway
The best packable snack is the one you will actually prepare and enjoy. Choose a snack box if you like variety, a wrap if you need something more filling, or a yogurt jar if you want a cold, sweet option that still feels balanced.
Want more simple ideas that work for real life? Explore more easy lunchbox meals around 400 kcal and build a weekly rotation you can prep without overthinking it.
FAQ
Are these snacks really under 400 kcal?
Yes, each snack is estimated to be under 400 kcal per serving based on the listed ingredients and portions. Calories can vary depending on the brands you use and how accurately ingredients are measured.
Can I meal prep these snacks ahead of time?
Most of them can be prepped ahead for 24 hours. Yogurt jars, snack boxes, cottage cheese boxes, and roll-ups work especially well. For crunchy items like crackers or rice cakes, pack them separately until serving.
Which snack is highest in protein?
The tuna corn cucumber cups and mini chicken avocado tortilla roll-ups are among the highest-protein options in this list. The cottage cheese pita snack box and Greek yogurt berry oat jar are also strong choices.
What is the best snack to take to work?
The turkey cheddar apple protein box, cottage cheese pita snack box, and chicken avocado roll-ups are all very work-friendly. They pack neatly, hold up well, and do not require reheating.
Can I make these snacks vegetarian?
Yes. Choose the Greek yogurt berry oat jar, peanut butter banana rice cake stack, and cottage cheese pita snack box. For the wraps, you can swap meat or tuna for boiled egg, baked tofu, or extra hummus.
How do I keep packable snacks fresh?
Use sealed containers, keep wet and dry ingredients separate, and add an ice pack for dairy, meat, eggs, fish, or chicken. Assemble crunchy snacks shortly before eating when possible.