Takeout flavor, home-cooked portions.
Takeout cravings are completely normal, especially on busy days when cooking feels like one more thing on the list. These takeout-style meals under 400 calories are designed to give you that saucy, savory, comforting feeling without relying on oversized portions or mystery calories.
Each recipe is practical, balanced, and made with normal supermarket ingredients. You’ll find rice bowls, noodles, wraps, skillet meals, and snack-box style plates that feel fun to eat but still fit into a lighter routine.
Table of Contents
These takeout-style meals under 400 calories are easy homemade recipes inspired by popular delivery favorites. Each meal lands roughly between 335 and 395 kcal per serving, with clear portions, simple steps, and practical swaps. They work well for quick dinners, lunches, and light meal prep.
Why You’ll Love This:
- They feel flavorful and satisfying without being complicated.
- Each recipe includes metric and imperial measurements.
- The portions are clear, realistic, and beginner-friendly.
Roundup at a Glance
| Recipe | Style | Time | Estimated kcal per serving |
|---|---|---|---|
| Teriyaki Chicken Rice Bowl | Japanese-inspired | 25 minutes | 390 kcal |
| Sweet Chili Shrimp Noodle Bowl | Thai-inspired | 20 minutes | 382 kcal |
| Light Orange Chicken Skillet | Chinese-inspired | 25 minutes | 386 kcal |
| Taco Takeout Rice Bowl | Tex-Mex-inspired | 22 minutes | 395 kcal |
| Chicken Shawarma Wrap Plate | Middle Eastern-inspired | 25 minutes | 392 kcal |
| Egg Fried Rice with Crispy Tofu | Asian-inspired vegetarian | 25 minutes | 384 kcal |
| Cheeseburger Takeout Salad Bowl | American diner-inspired | 20 minutes | 378 kcal |
Calories are estimates and may vary depending on the brands, exact ingredient weights, and portioning.
Recipe 1: Teriyaki Chicken Rice Bowl
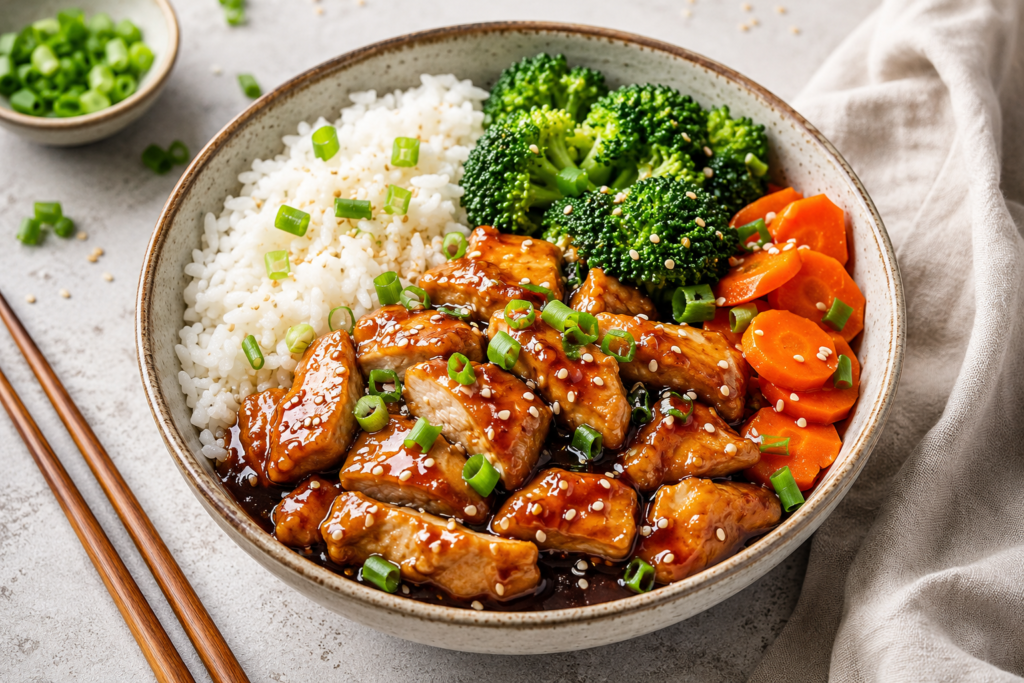
This bowl gives you the glossy, savory-sweet feeling of teriyaki takeout, but with a lighter sauce and a controlled rice portion. The vegetables add volume, while the chicken keeps it filling enough for dinner.
Recipe at a Glance
- Prep time: 10 minutes
- Cook time: 15 minutes
- Total time: 25 minutes
- Servings: 1
- Estimated kcal per serving: 390 kcal
Ingredients
| Ingredient | Metric quantity | Imperial quantity | Estimated kcal for listed amount | Notes / swaps |
|---|---|---|---|---|
| Skinless chicken breast | 100 g | 3.5 oz | 165 kcal | Chicken thigh works, but adds calories |
| Cooked white rice | 80 g | 1/2 cup | 104 kcal | Use cooked jasmine or basmati rice |
| Broccoli florets | 90 g | 1 cup | 31 kcal | Frozen broccoli works well |
| Carrot, thinly sliced | 40 g | 1/3 cup | 16 kcal | Swap with bell pepper |
| Low-sodium soy sauce | 15 ml | 1 tbsp | 10 kcal | Tamari works if needed |
| Honey | 7 g | 1 tsp | 21 kcal | Maple syrup also works |
| Rice vinegar | 15 ml | 1 tbsp | 3 kcal | Adds brightness |
| Cornstarch | 3 g | 1 tsp | 11 kcal | Helps thicken the sauce |
| Sesame oil | 3 ml | 1/2 tsp | 24 kcal | Use a small amount for flavor |
| Garlic, minced | 3 g | 1 small clove | 4 kcal | Fresh is best |
| Fresh ginger, grated | 2 g | 1/2 tsp | 2 kcal | Optional but recommended |
| Spring onion | 5 g | 1 tbsp sliced | 2 kcal | For topping |
Total estimated kcal for the whole recipe: 393 kcal
Estimated kcal per serving: 390 kcal
Equipment Needed
- Non-stick skillet
- Small bowl
- Knife and chopping board
- Measuring spoons
How to Make It
- Slice the chicken into small bite-size pieces, about 2 cm / 3/4 inch wide, so they cook quickly and evenly.
- Stir the soy sauce, honey, rice vinegar, cornstarch, garlic, ginger, and 2 tablespoons of water in a small bowl until the cornstarch dissolves.
- Heat a non-stick skillet over medium-high heat for 1 minute. Add the sesame oil and swirl it across the pan.
- Add the chicken in a single layer. Cook for 4–5 minutes, stirring every minute, until the pieces turn white on the outside and lightly golden at the edges.
- Add the broccoli and carrot. Stir for 3–4 minutes, until the broccoli turns bright green and the carrot begins to soften.
- Reduce the heat to medium. Pour in the sauce and stir for 1–2 minutes, until it becomes glossy and coats the chicken.
- Check the chicken by cutting one larger piece in half. It should be fully white inside with no pink center.
- Spoon the cooked rice into a bowl. Add the chicken and vegetables on top.
- Sprinkle with spring onion and serve warm.
Tips for Best Results
- Keep the chicken pieces small so they cook before the sauce reduces too much.
- Use low-sodium soy sauce to keep the flavor balanced.
- Add 1 tablespoon of water if the sauce thickens too quickly.
- Cook the vegetables just until bright, not mushy.
Easy Swaps and Variations
- Swap rice for cauliflower rice if you want a larger bowl for fewer calories.
- Add red pepper flakes for heat.
- Use turkey breast strips instead of chicken.
- Add cucumber on the side for freshness.
Storage and Meal-Prep Notes
Store the rice, chicken, and vegetables in an airtight container in the fridge for up to 3 days. Reheat in the microwave for 1–2 minutes, stirring halfway through. Add a splash of water before reheating to loosen the sauce. This recipe is not ideal for freezing because the vegetables can become soft.
What to Serve With It
Serve with cucumber slices, steamed green beans, or a small side salad with lime juice. Keep extra sauces light, because bottled teriyaki-style sauces can add calories quickly.
Nutrition Estimate
- Total kcal: approximately 393 kcal
- Kcal per serving: approximately 390 kcal
- Protein: approximately 35 g
- Carbs: approximately 45 g
- Fat: approximately 7 g
Nutrition values are estimates and may vary depending on brands, exact weights, and portionining.
Recipe 2: Sweet Chili Shrimp Noodle Bowl
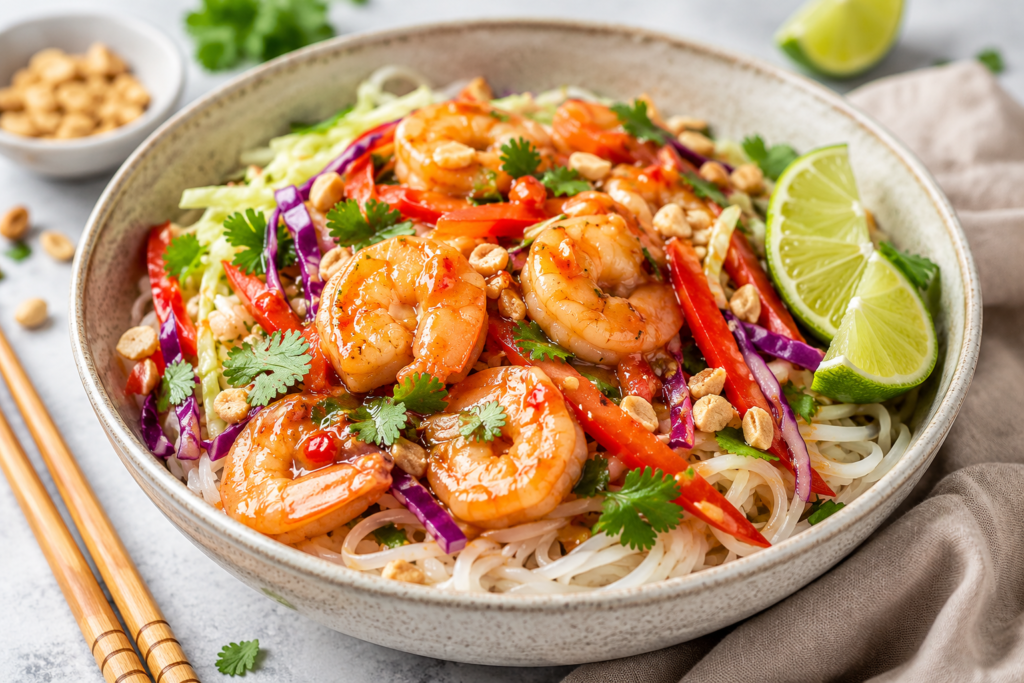
This recipe has the sweet, spicy, slurpy feeling of a noodle takeaway, but the portion stays balanced with shrimp, vegetables, and a lighter sauce. It works well as a quick dinner when you want something fast but still colorful.
Recipe at a Glance
- Prep time: 10 minutes
- Cook time: 10 minutes
- Total time: 20 minutes
- Servings: 1
- Estimated kcal per serving: 382 kcal
Ingredients
| Ingredient | Metric quantity | Imperial quantity | Estimated kcal for listed amount | Notes / swaps |
|---|---|---|---|---|
| Cooked shrimp, peeled | 120 g | 4.2 oz | 120 kcal | Use fresh or thawed frozen shrimp |
| Cooked rice noodles | 110 g | 3.9 oz | 119 kcal | Weigh after cooking |
| Red bell pepper, sliced | 70 g | 1/2 medium | 22 kcal | Adds sweetness and crunch |
| Cabbage, shredded | 80 g | 1 cup | 20 kcal | Use coleslaw mix for speed |
| Sweet chili sauce | 20 g | 1 tbsp | 48 kcal | Choose a moderate-sugar version if preferred |
| Low-sodium soy sauce | 10 ml | 2 tsp | 7 kcal | Adds savory depth |
| Lime juice | 15 ml | 1 tbsp | 4 kcal | Fresh lime is best |
| Sesame oil | 3 ml | 1/2 tsp | 24 kcal | Small amount for aroma |
| Garlic, minced | 3 g | 1 small clove | 4 kcal | Optional but useful |
| Fresh coriander | 5 g | 2 tbsp | 1 kcal | Swap with spring onion |
| Crushed peanuts | 4 g | 1 tsp | 23 kcal | Optional crunch |
Total estimated kcal for the whole recipe: 392 kcal
Estimated kcal per serving: 382 kcal
Equipment Needed
- Non-stick skillet or wok
- Small bowl
- Tongs
- Knife and chopping board
How to Make It
- Pat the shrimp dry with kitchen paper so they sear instead of steaming.
- Stir the sweet chili sauce, soy sauce, lime juice, garlic, and 1 tablespoon of water in a small bowl.
- Heat a non-stick skillet over medium-high heat for 1 minute. Add the sesame oil.
- Add the bell pepper and cabbage. Stir-fry for 3–4 minutes, until the cabbage softens slightly but still has bite.
- Add the shrimp. Stir for 1–2 minutes, until the shrimp are hot and lightly glossy.
- Add the cooked rice noodles. Toss with tongs for 1 minute to separate the strands.
- Reduce the heat to medium-low. Pour in the sauce and toss for 1–2 minutes, until the noodles are coated and the sauce clings lightly.
- Transfer to a bowl. Top with coriander and crushed peanuts.
- Serve immediately while the noodles are warm and springy.
Tips for Best Results
- Do not overcook already-cooked shrimp; they only need heating through.
- Rinse cooked rice noodles briefly if they are sticky.
- Use tongs to toss the noodles without breaking them.
- Add lime at the end if you want a fresher flavor.
Easy Swaps and Variations
- Swap shrimp for cooked chicken breast.
- Use zucchini noodles for a lighter bowl.
- Add grated carrot for extra crunch.
- Skip peanuts if you want to reduce calories slightly.
Storage and Meal-Prep Notes
Store in the fridge for up to 2 days. Reheat gently in a skillet with 1–2 tablespoons of water for 2–3 minutes over medium heat. The noodles may firm up after chilling, so loosen them before reheating. This recipe is best fresh and is not recommended for freezing.
What to Serve With It
Serve with cucumber sticks, extra lime wedges, or a simple side of steamed edamame if you have room in your meal plan.
Nutrition Estimate
- Total kcal: approximately 392 kcal
- Kcal per serving: approximately 382 kcal
- Protein: approximately 29 g
- Carbs: approximately 50 g
- Fat: approximately 8 g
Nutrition values are estimates and may vary depending on brands, exact weights, and portioning.
Recipe 3: Light Orange Chicken Skillet
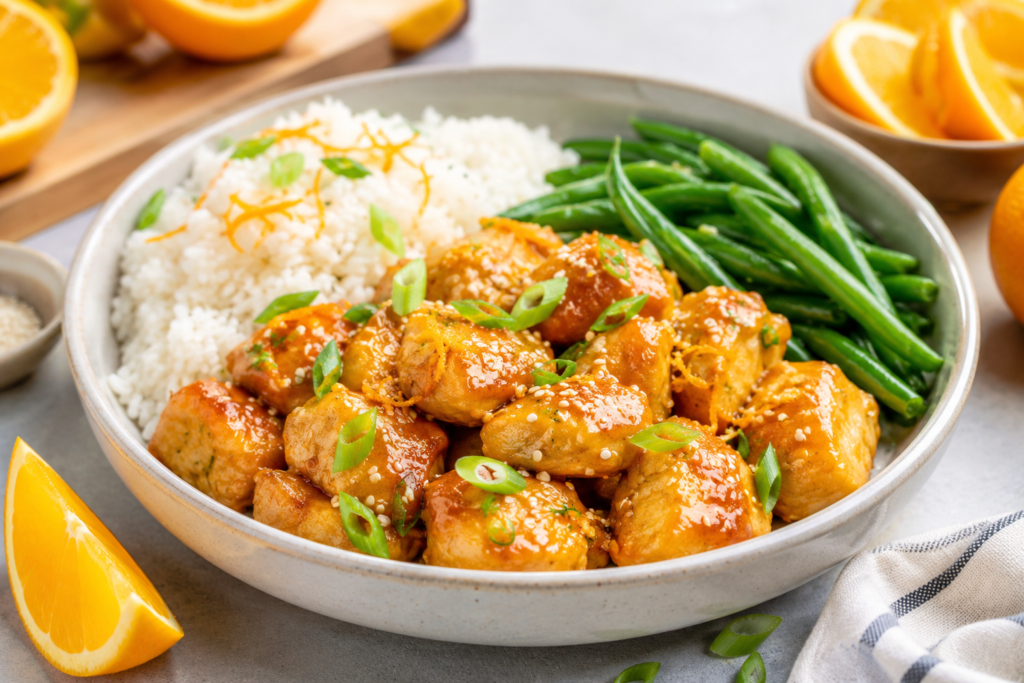
This skillet keeps the citrusy, sticky comfort of orange chicken but skips deep frying. The chicken is lightly coated, pan-seared, and tossed in a quick orange sauce that tastes bright rather than heavy.
Recipe at a Glance
- Prep time: 10 minutes
- Cook time: 15 minutes
- Total time: 25 minutes
- Servings: 1
- Estimated kcal per serving: 386 kcal
Ingredients
| Ingredient | Metric quantity | Imperial quantity | Estimated kcal for listed amount | Notes / swaps |
|---|---|---|---|---|
| Skinless chicken breast | 110 g | 3.9 oz | 182 kcal | Cut into small cubes |
| Cooked white rice | 70 g | 1/3 cup plus 1 tbsp | 91 kcal | Weigh cooked rice |
| Green beans | 100 g | 1 cup | 31 kcal | Fresh or frozen |
| Cornstarch | 5 g | 1 1/2 tsp | 19 kcal | Light coating for chicken |
| Orange juice | 45 ml | 3 tbsp | 20 kcal | Use fresh or 100% juice |
| Orange zest | 1 g | 1/2 tsp | 1 kcal | Adds strong orange flavor |
| Low-sodium soy sauce | 10 ml | 2 tsp | 7 kcal | Balances sweetness |
| Honey | 5 g | 3/4 tsp | 15 kcal | Small amount is enough |
| Rice vinegar | 10 ml | 2 tsp | 2 kcal | Adds brightness |
| Garlic, minced | 3 g | 1 small clove | 4 kcal | Fresh or paste |
| Neutral cooking oil | 3 ml | 1/2 tsp | 24 kcal | Use a non-stick pan |
Total estimated kcal for the whole recipe: 396 kcal
Estimated kcal per serving: 386 kcal
Equipment Needed
- Non-stick skillet
- Small bowl
- Microplane or fine grater
- Knife and chopping board
How to Make It
- Cut the chicken into 2 cm / 3/4 inch cubes and place it in a bowl.
- Sprinkle the cornstarch over the chicken. Toss until the pieces are thinly coated.
- Stir the orange juice, orange zest, soy sauce, honey, rice vinegar, garlic, and 1 tablespoon of water in a small bowl.
- Heat a non-stick skillet over medium-high heat for 1 minute. Add the oil.
- Add the chicken in a single layer. Cook for 4 minutes without moving too much, until the bottom turns lightly golden.
- Flip and stir the chicken. Cook for another 3–4 minutes, until the outside is golden and the pieces are almost cooked through.
- Add the green beans. Stir for 3 minutes, until they turn bright green and begin to soften.
- Reduce the heat to medium-low. Pour in the orange sauce and stir for 1–2 minutes, until the sauce thickens and coats the chicken.
- Cut one larger chicken piece in half. It should be fully white inside with no pink center.
- Serve the orange chicken and green beans over the cooked rice.
Tips for Best Results
- Use orange zest, not just juice, for a stronger orange flavor.
- Keep the cornstarch coating thin so the recipe stays light.
- Use medium-low heat after adding the sauce to prevent burning.
- Add a pinch of chili flakes if you like a spicy orange sauce.
Easy Swaps and Variations
- Swap green beans for broccoli or snap peas.
- Use turkey breast instead of chicken.
- Replace rice with cauliflower rice for a lower-calorie version.
- Add a few sesame seeds if you have calories to spare.
Storage and Meal-Prep Notes
Store in an airtight container in the fridge for up to 3 days. Reheat in a skillet over medium heat with 1 tablespoon of water for 3–4 minutes, or microwave for 1–2 minutes. Freeze without the rice for up to 1 month, then cook fresh rice when serving.
What to Serve With It
Serve with cucumber salad, steamed broccoli, or a small bowl of miso-style broth. Keep sides simple because the orange sauce is already flavorful.
Nutrition Estimate
- Total kcal: approximately 396 kcal
- Kcal per serving: approximately 386 kcal
- Protein: approximately 38 g
- Carbs: approximately 42 g
- Fat: approximately 7 g
Nutrition values are estimates and may vary depending on brands, exact weights, and portioning.
Recipe 4: Taco Takeout Rice Bowl
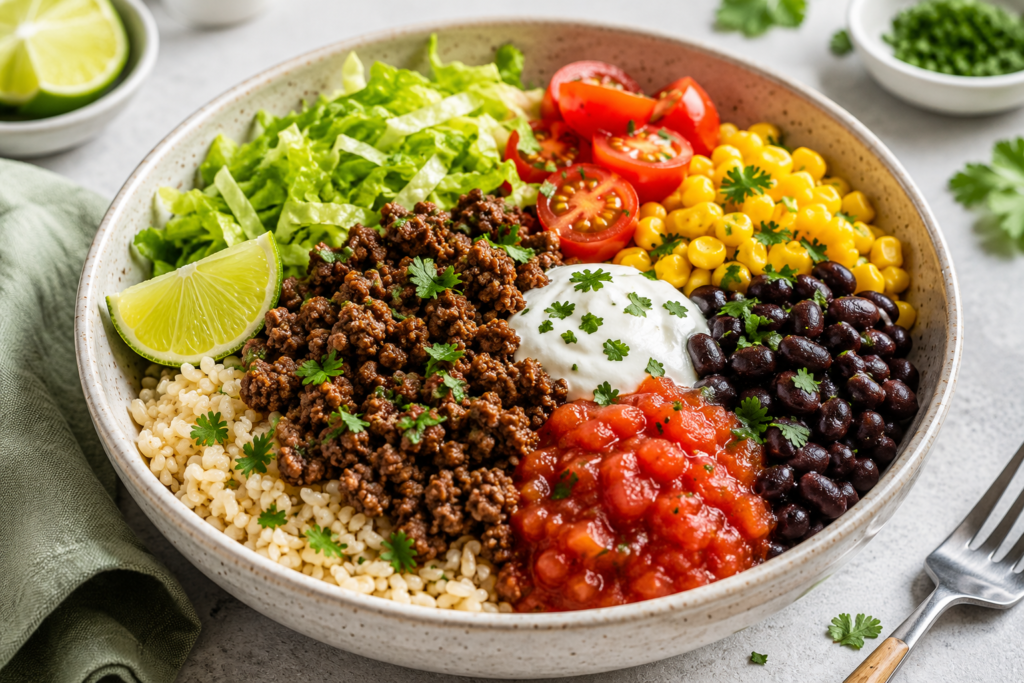
This bowl has the flavor of a loaded taco order, but it uses lean beef, beans, salsa, and a measured rice base to keep the portion balanced. It is fast, filling, and easy to pack for lunch.
Recipe at a Glance
- Prep time: 8 minutes
- Cook time: 14 minutes
- Total time: 22 minutes
- Servings: 1
- Estimated kcal per serving: 395 kcal
Ingredients
| Ingredient | Metric quantity | Imperial quantity | Estimated kcal for listed amount | Notes / swaps |
|---|---|---|---|---|
| Lean ground beef, 5% fat | 85 g | 3 oz | 147 kcal | Turkey mince also works |
| Cooked brown rice | 80 g | 1/2 cup | 89 kcal | Use cooked white rice if preferred |
| Black beans, drained | 45 g | 1/4 cup | 61 kcal | Rinse before using |
| Tomato salsa | 50 g | 3 tbsp | 18 kcal | Choose a chunky salsa |
| Lettuce, shredded | 50 g | 1 cup | 8 kcal | Romaine or iceberg |
| Cherry tomatoes | 60 g | 1/2 cup | 11 kcal | Dice if preferred |
| Sweetcorn | 25 g | 2 tbsp | 24 kcal | Optional but adds sweetness |
| Reduced-fat Greek yogurt | 35 g | 2 tbsp | 25 kcal | Replaces sour cream |
| Taco seasoning | 4 g | 1 tsp | 10 kcal | Use low-salt if possible |
| Lime juice | 10 ml | 2 tsp | 3 kcal | For brightness |
Total estimated kcal for the whole recipe: 396 kcal
Estimated kcal per serving: 395 kcal
Equipment Needed
- Non-stick skillet
- Bowl
- Spoon
- Knife and chopping board
How to Make It
- Heat a non-stick skillet over medium-high heat for 1 minute.
- Add the lean ground beef. Break it into small pieces with a spoon.
- Cook for 5–6 minutes, stirring often, until the beef is browned and no pink pieces remain.
- Sprinkle in the taco seasoning. Add 2 tablespoons of water and stir for 1 minute, until the beef is coated and the liquid reduces.
- Add the black beans and sweetcorn. Stir for 2 minutes, until heated through.
- Warm the cooked rice in the microwave for 45–60 seconds, or stir it into the skillet for 1 minute.
- Add the rice to a bowl. Top with the beef mixture.
- Add lettuce, tomatoes, salsa, Greek yogurt, and lime juice.
- Serve immediately, or let the hot beef cool slightly before packing for lunch.
Tips for Best Results
- Use lean beef to keep the flavor rich but the calories controlled.
- Add the lettuce after cooking so it stays crisp.
- Use Greek yogurt instead of sour cream for a lighter topping.
- Keep salsa chunky so the bowl does not become watery.
Easy Swaps and Variations
- Swap beef for turkey mince or chicken mince.
- Use cauliflower rice instead of brown rice.
- Add jalapeños for heat.
- Add avocado only if you adjust the portion elsewhere.
Storage and Meal-Prep Notes
Store the cooked beef, rice, beans, and corn together for up to 3 days. Keep lettuce, tomato, yogurt, and salsa in a separate container. Reheat the hot base for 1–2 minutes, then add the fresh toppings. This recipe does not freeze well once assembled, but the beef mixture can be frozen for up to 2 months.
What to Serve With It
Serve with extra shredded lettuce, cucumber, or a small side of grilled peppers. Avoid large portions of tortilla chips if you want to keep the meal close to 400 calories.
Nutrition Estimate
- Total kcal: approximately 396 kcal
- Kcal per serving: approximately 395 kcal
- Protein: approximately 31 g
- Carbs: approximately 42 g
- Fat: approximately 11 g
Nutrition values are estimates and may vary depending on brands, exact weights, and portioning.
Recipe 5: Chicken Shawarma Wrap Plate
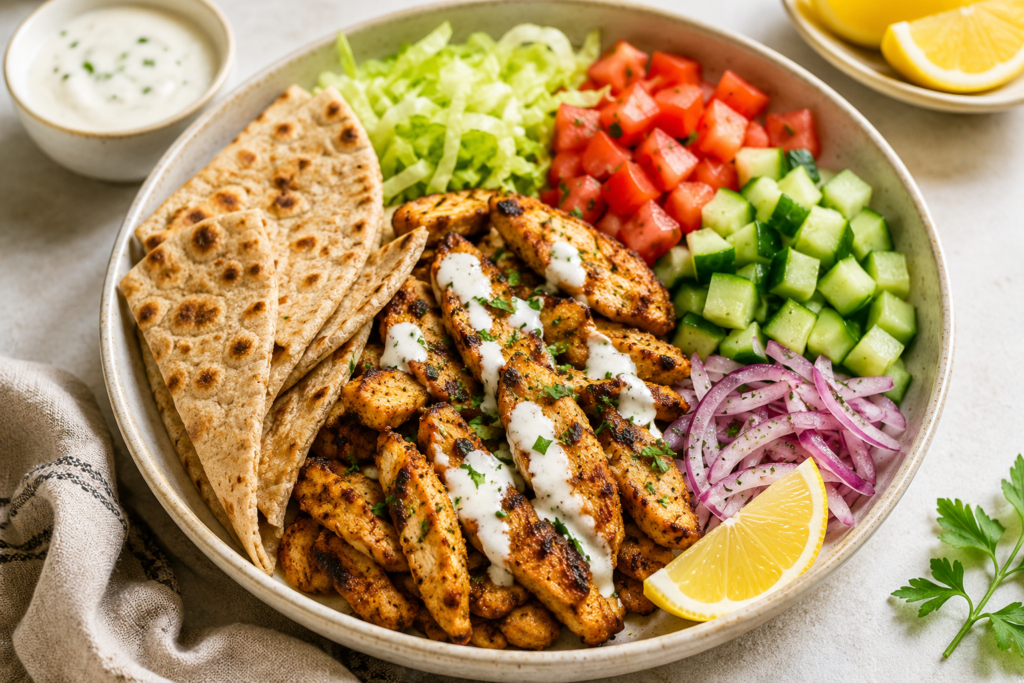
This recipe is inspired by a shawarma wrap, but served as a lighter wrap plate with yogurt sauce, crisp vegetables, and a measured flatbread. It feels generous because the fresh toppings add volume and crunch.
Recipe at a Glance
- Prep time: 12 minutes
- Cook time: 13 minutes
- Total time: 25 minutes
- Servings: 1
- Estimated kcal per serving: 392 kcal
Ingredients
| Ingredient | Metric quantity | Imperial quantity | Estimated kcal for listed amount | Notes / swaps |
|---|---|---|---|---|
| Skinless chicken breast | 100 g | 3.5 oz | 165 kcal | Slice into strips |
| Small whole wheat flatbread | 45 g | 1 small flatbread | 125 kcal | Use a thin wrap |
| Greek yogurt, 2% | 50 g | 3 tbsp | 37 kcal | For sauce |
| Cucumber, diced | 80 g | 1/2 cup | 12 kcal | Adds crunch |
| Tomato, diced | 70 g | 1/2 cup | 13 kcal | Use firm tomato |
| Red onion, thinly sliced | 15 g | 2 tbsp | 6 kcal | Optional |
| Lemon juice | 15 ml | 1 tbsp | 4 kcal | For sauce and freshness |
| Olive oil | 3 ml | 1/2 tsp | 24 kcal | Helps spices coat chicken |
| Shawarma spice mix | 4 g | 1 tsp | 8 kcal | Or use cumin, paprika, garlic powder |
| Garlic, grated | 2 g | 1/2 clove | 3 kcal | For yogurt sauce |
Total estimated kcal for the whole recipe: 397 kcal
Estimated kcal per serving: 392 kcal
Equipment Needed
- Non-stick skillet
- Small bowl
- Knife and chopping board
- Tongs
How to Make It
- Slice the chicken into thin strips so it cooks quickly.
- Toss the chicken with olive oil, shawarma spice mix, half the lemon juice, and a small pinch of salt.
- Stir the Greek yogurt, garlic, remaining lemon juice, and 1 teaspoon of water in a small bowl until smooth.
- Heat a non-stick skillet over medium-high heat for 1 minute.
- Add the chicken strips in a single layer. Cook for 4 minutes, until the underside is golden.
- Flip the chicken and cook for another 4–5 minutes, until the strips are browned and fully white inside.
- Warm the flatbread in a dry skillet for 20–30 seconds per side, until soft and flexible.
- Arrange the flatbread on a plate. Add cucumber, tomato, red onion, and chicken.
- Drizzle with yogurt sauce and fold loosely, or serve open-style with the sauce on the side.
Tips for Best Results
- Slice the chicken thinly for better browning.
- Warm the flatbread so it does not crack.
- Keep the yogurt sauce thick enough to drizzle, not watery.
- Add extra lemon at the end if the plate tastes too rich.
Easy Swaps and Variations
- Swap chicken for turkey strips.
- Use a high-protein wrap if it fits your calorie target.
- Add shredded lettuce for more volume.
- Add pickles for a more takeout-style flavor.
Storage and Meal-Prep Notes
Store cooked chicken in the fridge for up to 3 days. Keep flatbread, vegetables, and sauce separate until serving. Reheat the chicken for 1–2 minutes, then assemble. Do not freeze the assembled wrap plate, but the cooked chicken can be frozen for up to 2 months.
What to Serve With It
Serve with extra cucumber, shredded lettuce, or a few pickled vegetables. If you want a bigger plate, add more non-starchy vegetables rather than a second flatbread.
Nutrition Estimate
- Total kcal: approximately 397 kcal
- Kcal per serving: approximately 392 kcal
- Protein: approximately 38 g
- Carbs: approximately 38 g
- Fat: approximately 10 g
Nutrition values are estimates and may vary depending on brands, exact weights, and portioning.
Recipe 6: Egg Fried Rice with Crispy Tofu
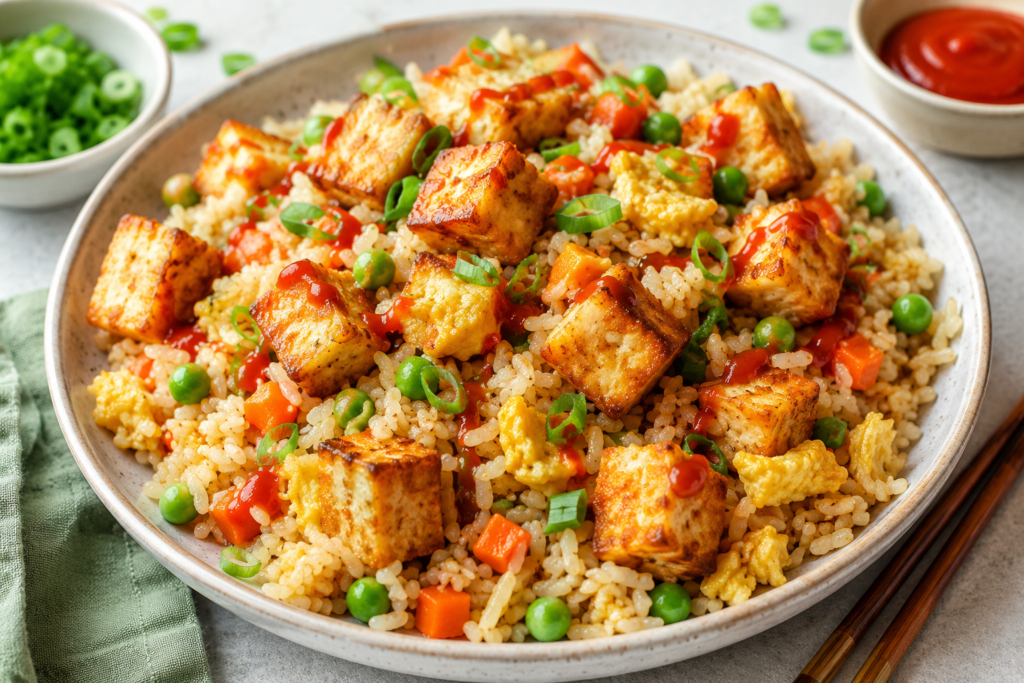
This vegetarian fried rice gives you the comfort of a takeout box with a lighter, protein-focused approach. The tofu adds texture, the egg makes it satisfying, and the vegetables help stretch the bowl without needing a large rice portion.
Recipe at a Glance
- Prep time: 10 minutes
- Cook time: 15 minutes
- Total time: 25 minutes
- Servings: 1
- Estimated kcal per serving: 384 kcal
Ingredients
| Ingredient | Metric quantity | Imperial quantity | Estimated kcal for listed amount | Notes / swaps |
|---|---|---|---|---|
| Firm tofu | 90 g | 3.2 oz | 108 kcal | Press dry before cooking |
| Egg | 1 large | 1 large | 72 kcal | Adds protein and richness |
| Cooked rice, chilled | 80 g | 1/2 cup | 104 kcal | Cold rice works best |
| Frozen peas and carrots | 70 g | 1/2 cup | 45 kcal | No chopping needed |
| Low-sodium soy sauce | 15 ml | 1 tbsp | 10 kcal | Add at the end |
| Sesame oil | 3 ml | 1/2 tsp | 24 kcal | Strong flavor in a small amount |
| Spring onion | 10 g | 2 tbsp sliced | 3 kcal | For freshness |
| Garlic powder | 1 g | 1/4 tsp | 3 kcal | Quick flavor |
| Cooking spray | 1 second spray | 1 second spray | 5 kcal | Helps crisp tofu |
| Sriracha | 5 g | 1 tsp | 10 kcal | Optional topping |
Total estimated kcal for the whole recipe: 384 kcal
Estimated kcal per serving: 384 kcal
Equipment Needed
- Non-stick skillet or wok
- Spatula
- Small bowl
- Kitchen paper
How to Make It
- Pat the tofu dry with kitchen paper. Cut it into small cubes.
- Heat a non-stick skillet over medium-high heat for 1 minute. Spray lightly with cooking spray.
- Add the tofu cubes in a single layer. Cook for 5–6 minutes, turning every 1–2 minutes, until the edges look golden and slightly crisp.
- Push the tofu to one side of the pan. Crack the egg into the empty side.
- Stir the egg for 45–60 seconds, until soft curds form and no liquid egg remains.
- Add the frozen peas and carrots. Stir for 2–3 minutes, until hot and bright.
- Add the chilled rice and break up any clumps with the spatula.
- Stir-fry for 2–3 minutes, until the rice is hot and lightly toasted at the edges.
- Add the soy sauce, sesame oil, garlic powder, and spring onion.
- Stir for 1 minute, until everything is evenly coated. Top with sriracha if using.
Tips for Best Results
- Use chilled rice so it fries instead of becoming sticky.
- Dry the tofu well before cooking.
- Keep the pan hot once the rice goes in.
- Add soy sauce around the edge of the pan for better flavor.
Easy Swaps and Variations
- Swap tofu for edamame if preferred.
- Use cauliflower rice for part of the rice if you want more volume.
- Add mushrooms or cabbage for extra vegetables.
- Skip sriracha if you prefer a mild bowl.
Storage and Meal-Prep Notes
Store in the fridge for up to 3 days. Reheat in a skillet over medium heat for 3–4 minutes, stirring often, or microwave for 1–2 minutes. Add a splash of water if the rice feels dry. Freezing is possible, but the tofu texture may become firmer.
What to Serve With It
Serve with cucumber slices, steamed pak choi, or a small side of miso-style soup. Keep extra sauces measured because fried rice absorbs sauce quickly.
Nutrition Estimate
- Total kcal: approximately 384 kcal
- Kcal per serving: approximately 384 kcal
- Protein: approximately 24 g
- Carbs: approximately 43 g
- Fat: approximately 13 g
Nutrition values are estimates and may vary depending on brands, exact weights, and portioning.
Recipe 7: Cheeseburger Takeout Salad Bowl
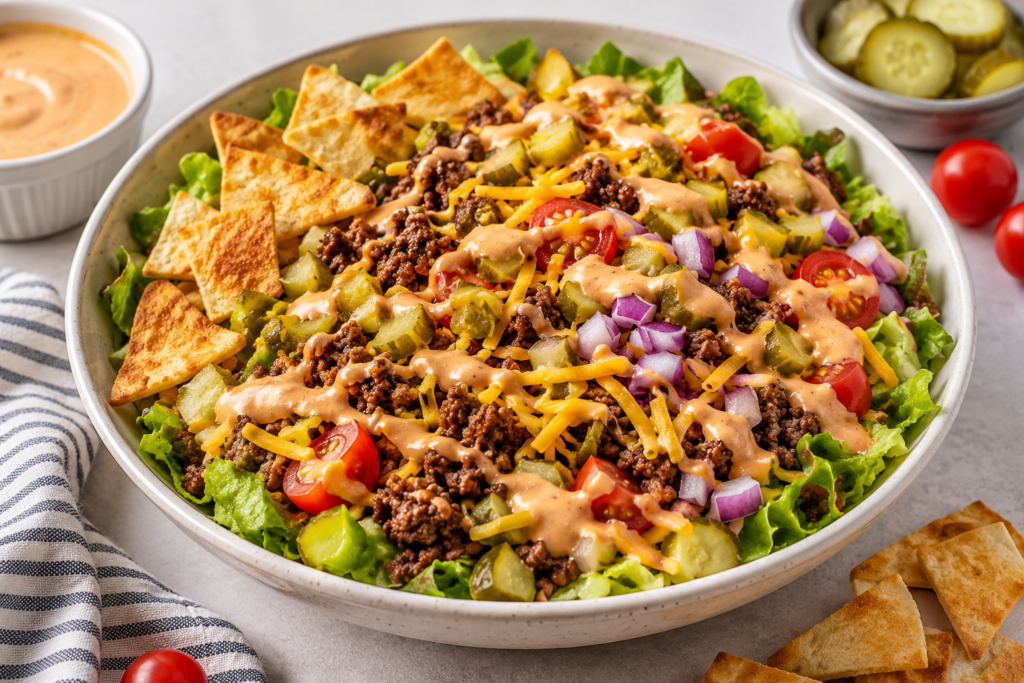
This bowl gives you the flavor of a cheeseburger order in a lighter, fork-friendly format. You still get beef, cheese, pickles, sauce, and crunch, but the lettuce base keeps the meal fresh and under 400 calories.
Recipe at a Glance
- Prep time: 10 minutes
- Cook time: 10 minutes
- Total time: 20 minutes
- Servings: 1
- Estimated kcal per serving: 378 kcal
Ingredients
| Ingredient | Metric quantity | Imperial quantity | Estimated kcal for listed amount | Notes / swaps |
|---|---|---|---|---|
| Lean ground beef, 5% fat | 90 g | 3.2 oz | 156 kcal | Turkey mince also works |
| Romaine lettuce, chopped | 100 g | 3 cups | 17 kcal | Keeps the bowl crisp |
| Cherry tomatoes | 80 g | 1/2 cup | 14 kcal | Adds juiciness |
| Pickles, chopped | 30 g | 2 tbsp | 4 kcal | Gives burger flavor |
| Red onion, diced | 20 g | 2 tbsp | 8 kcal | Optional |
| Reduced-fat cheddar | 20 g | 2 tbsp shredded | 64 kcal | Use sharp cheddar for more flavor |
| Light mayonnaise | 15 g | 1 tbsp | 45 kcal | For burger sauce |
| Ketchup | 10 g | 2 tsp | 11 kcal | For sauce |
| Yellow mustard | 5 g | 1 tsp | 3 kcal | Adds tang |
| Small whole wheat pita chips | 15 g | 1/2 oz | 56 kcal | Adds bun-like crunch |
Total estimated kcal for the whole recipe: 378 kcal
Estimated kcal per serving: 378 kcal
Equipment Needed
- Non-stick skillet
- Salad bowl
- Small bowl
- Spoon
How to Make It
- Heat a non-stick skillet over medium-high heat for 1 minute.
- Add the lean ground beef and break it into small crumbles with a spoon.
- Cook for 6–7 minutes, stirring often, until the beef is browned and no pink remains.
- Reduce the heat to low. Add the shredded cheddar and stir for 30–45 seconds, until it starts to melt into the beef.
- Stir the light mayonnaise, ketchup, and mustard in a small bowl to make the burger sauce.
- Add the romaine lettuce, tomatoes, pickles, and red onion to a bowl.
- Spoon the warm cheesy beef over the salad.
- Drizzle the burger sauce over the top.
- Crush the pita chips lightly and sprinkle them over the bowl just before serving.
Tips for Best Results
- Use sharp cheddar so a smaller amount still tastes cheesy.
- Add the pita chips last so they stay crunchy.
- Chop the lettuce into bite-size pieces for easier eating.
- Drain any excess liquid from pickles before adding them.
Easy Swaps and Variations
- Swap beef for lean turkey mince.
- Use a low-calorie burger sauce if you already have one you like.
- Add cucumber for extra crunch.
- Use a small diced toasted bun instead of pita chips if the calories fit.
Storage and Meal-Prep Notes
Store the cooked beef separately from the salad for up to 3 days. Keep the sauce in a small container and add pita chips just before eating. Reheat the beef for 45–60 seconds, then assemble. Do not freeze the assembled salad.
What to Serve With It
Serve with extra lettuce, cucumber sticks, or a small portion of air-fried vegetables. If you want a classic burger feeling, add a few extra pickles rather than more chips.
Nutrition Estimate
- Total kcal: approximately 378 kcal
- Kcal per serving: approximately 378 kcal
- Protein: approximately 31 g
- Carbs: approximately 24 g
- Fat: approximately 18 g
Nutrition values are estimates and may vary depending on brands, exact weights, and portioning.
Final Practical Takeaway
If you want the closest takeout feeling, start with the orange chicken or sweet chili shrimp noodles. If you need something filling for lunch, choose the taco rice bowl or shawarma wrap plate. For a lighter dinner that still feels fun, the cheeseburger salad bowl is the easiest win.
FAQ
Are these takeout-style meals really under 400 calories?
Yes, each recipe is designed to stay around 400 calories per serving based on the listed ingredients and portions. Calories are estimates and can change depending on brands, cooking methods, and exact serving sizes.
Can I meal prep these recipes?
Yes. The rice bowls, taco bowl, orange chicken, fried rice, and shawarma chicken all work well for meal prep. For best texture, store sauces, salad ingredients, and crunchy toppings separately until serving.
Are these recipes good for weight loss?
They can fit into a weight loss plan if they match your overall calorie needs. They are portion-controlled, practical, and balanced, but no single meal guarantees weight loss on its own.
Can I make these meals higher in protein?
Yes. Add slightly more lean chicken, shrimp, turkey, tofu, or Greek yogurt, then reduce rice, noodles, sauce, or toppings if you want to keep the meal close to 400 calories.
What is the best low-calorie swap for rice or noodles?
Cauliflower rice, shredded cabbage, zucchini noodles, and extra steamed vegetables can all add volume for fewer calories. You can also use a half portion of rice or noodles and add more vegetables.
Are these recipes suitable for lunchboxes?
Most of them are. The teriyaki chicken bowl, taco rice bowl, orange chicken skillet, and fried rice are especially lunchbox-friendly. Keep fresh toppings and sauces separate when possible.