Dinner can be simple.
Some nights, you do not need a perfect meal plan. You need food that is quick, warm, satisfying, and realistic after a long day. These lazy girl dinners under 400 calories are designed for exactly that kind of weeknight.
Each recipe uses easy ingredients, beginner-friendly steps, and practical portions that stay close to 400 kcal per serving. The calories are estimates, but the goal is simple: make dinner feel doable without turning it into another project.
Quick answer
This roundup gives you seven easy lazy girl dinners under 400 calories, made for busy weeknights when you want simple food with minimal effort. Each recipe serves one, lands around 350–400 kcal, and includes clear ingredients, beginner-friendly steps, storage notes, and easy swaps.
Why you’ll love this
- Low effort, real food: No complicated techniques or long prep lists.
- Around 400 kcal: Each dinner is portioned to feel balanced and satisfying.
- Busy-night friendly: Most recipes use pantry, fridge, freezer, or shortcut ingredients.
Roundup at a glance
| Recipe | Prep time | Cook time | Total time | Servings | Estimated kcal per serving |
|---|---|---|---|---|---|
| Lemon Garlic Rotisserie Chicken Rice Bowl | 8 min | 2 min | 10 min | 1 | 360 kcal |
| Turkey Taco Skillet Bowl | 8 min | 12 min | 20 min | 1 | 386 kcal |
| Creamy Tomato Chicken Tortellini Soup | 5 min | 12 min | 17 min | 1 | 383 kcal |
| Tuna White Bean Melt Wrap | 7 min | 6 min | 13 min | 1 | 356 kcal |
| Salmon Cucumber Sushi Bowl | 8 min | 2 min | 10 min | 1 | 361 kcal |
| Egg and Veggie Fried Rice | 6 min | 9 min | 15 min | 1 | 397 kcal |
| Shrimp Fajita Flatbread | 8 min | 10 min | 18 min | 1 | 355 kcal |
Calories are estimates and will vary depending on brands, exact quantities, and portioning.
Recipe 1: Lemon Garlic Rotisserie Chicken Rice Bowl
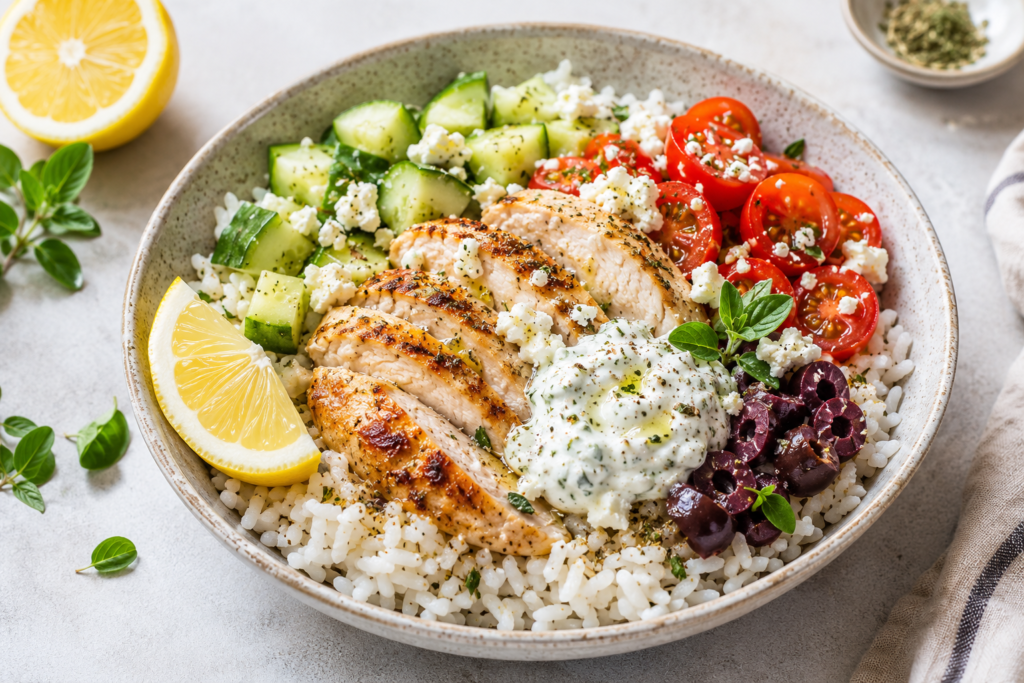
This is the dinner to make when you have cooked chicken and almost no energy. It tastes fresh, filling, and bright, but the actual work is mostly chopping and assembling.
Recipe at a glance
- Prep time: 8 minutes
- Cook time: 2 minutes
- Total time: 10 minutes
- Servings: 1
- Estimated kcal per serving: 360 kcal
Ingredients
| Ingredient | Metric quantity | Imperial quantity | Estimated kcal for listed amount | Notes / swaps |
|---|---|---|---|---|
| Cooked rice | 80 g | 1/2 cup scant | 104 kcal | Use microwave rice for speed |
| Rotisserie chicken breast, skin removed | 90 g | 3.2 oz | 149 kcal | Swap with leftover grilled chicken |
| Tzatziki | 35 g | 2 tbsp | 30 kcal | Use Greek yogurt with lemon if needed |
| Cucumber, diced | 80 g | 1/2 cup | 12 kcal | Adds crunch |
| Cherry tomatoes, halved | 80 g | 1/2 cup | 15 kcal | Any tomato works |
| Feta, crumbled | 15 g | 1 tbsp | 40 kcal | Use reduced-fat feta if preferred |
| Kalamata olives, sliced | 5 g | 2 small olives | 7 kcal | Optional but flavorful |
| Lemon juice | 15 ml | 1 tbsp | 3 kcal | Fresh is best |
| Garlic powder, oregano, black pepper | 1 g | 1/4 tsp total | 0 kcal | Adjust to taste |
Total estimated kcal for the whole recipe: 360 kcal
Estimated kcal per serving: 360 kcal
Equipment needed
- Microwave
- Bowl
- Cutting board
- Knife
- Spoon
How to make it
- Warm the cooked rice in a microwave-safe bowl for 60–90 seconds, until steaming but not dry.
- Add the rotisserie chicken on top of the rice and microwave for another 20–30 seconds, until the chicken is warm.
- Dice the cucumber and halve the cherry tomatoes while the rice warms.
- Season the warm rice and chicken with lemon juice, garlic powder, oregano, and black pepper. Stir gently so the seasoning spreads evenly.
- Top the bowl with cucumber, tomatoes, feta, olives, and tzatziki.
- Serve immediately while the rice and chicken are warm and the vegetables are still crisp.
Tips for best results
- Remove the chicken skin to keep the calories more predictable.
- Use warm rice, not cold rice, so the bowl feels more like dinner.
- Add the tzatziki at the end so it stays cool and creamy.
- Cut the vegetables small so every bite has crunch.
Easy swaps and variations
- Swap rice for cooked quinoa if you want a slightly nuttier base.
- Use grilled chicken strips instead of rotisserie chicken.
- Add shredded lettuce for more volume.
- Replace feta with a spoon of cottage cheese for a softer, higher-protein topping.
Storage and meal-prep notes
- Fridge: Store the chicken and rice separately from the vegetables for up to 2 days.
- Freezer: Not recommended once assembled.
- Reheat: Warm only the rice and chicken for 60–90 seconds, then add fresh toppings.
What to serve with it
Serve with extra cucumber slices, a small green salad, or sparkling water with lemon. Keep add-ons light if you want the meal to stay close to 400 kcal.
Nutrition estimate
- Total kcal: 360 kcal
- Kcal per serving: 360 kcal
- Rough protein: 33 g
- Rough carbs: 35 g
- Rough fat: 10 g
Nutrition values are estimates and may vary depending on ingredient brands, chicken type, and portion size.
Recipe 2: Turkey Taco Skillet Bowl
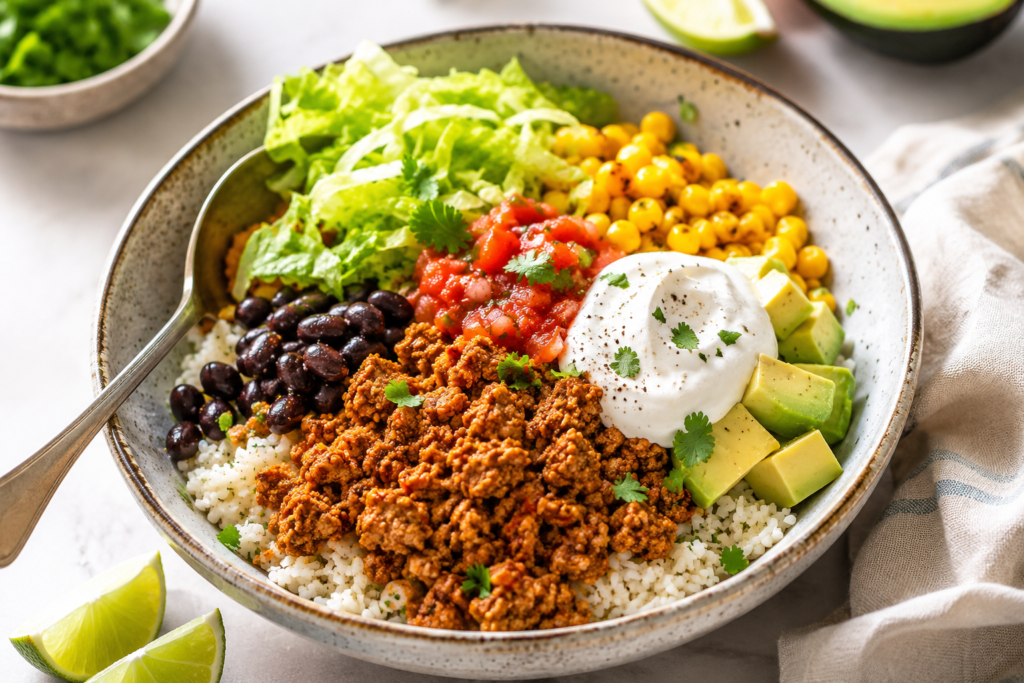
This one-pan dinner gives you taco-night flavor without needing a full spread of toppings. It is warm, filling, and easy to customize with whatever you already have.
Recipe at a glance
- Prep time: 8 minutes
- Cook time: 12 minutes
- Total time: 20 minutes
- Servings: 1
- Estimated kcal per serving: 386 kcal
Ingredients
| Ingredient | Metric quantity | Imperial quantity | Estimated kcal for listed amount | Notes / swaps |
|---|---|---|---|---|
| Lean ground turkey | 85 g | 3 oz | 145 kcal | 93% lean works well |
| Cooked rice | 60 g | 1/3 cup | 78 kcal | Use leftover or microwave rice |
| Black beans, drained | 35 g | 3 tbsp | 46 kcal | Rinse to reduce saltiness |
| Corn | 30 g | 2 tbsp | 29 kcal | Frozen or canned |
| Salsa | 60 g | 1/4 cup | 20 kcal | Choose mild or spicy |
| Shredded lettuce | 50 g | 1 cup | 8 kcal | Adds volume |
| Avocado | 20 g | 1.5 tbsp diced | 32 kcal | Optional but satisfying |
| Plain Greek yogurt | 30 g | 2 tbsp | 18 kcal | Use instead of sour cream |
| Taco seasoning | 5 g | 2 tsp | 10 kcal | Check sodium if needed |
| Oil spray | 1 second spray | 1 second spray | 0 kcal | Or use a nonstick pan |
Total estimated kcal for the whole recipe: 386 kcal
Estimated kcal per serving: 386 kcal
Equipment needed
- Nonstick skillet
- Spatula
- Bowl
- Measuring spoons
How to make it
- Heat a nonstick skillet over medium heat for 1 minute, then lightly coat it with oil spray.
- Add the ground turkey and break it into small pieces with a spatula. Cook for 5–6 minutes, stirring often, until no pink pieces remain.
- Sprinkle the taco seasoning over the turkey and add 2 tablespoons of water. Stir for 30 seconds until the turkey looks evenly coated.
- Add the black beans, corn, cooked rice, and salsa to the skillet. Stir and cook for 3–4 minutes, until the mixture is hot and slightly saucy.
- Reduce the heat to low and cook for 1 more minute if there is extra liquid in the pan. The bowl filling should look moist, not watery.
- Spoon the warm taco mixture into a bowl.
- Top with shredded lettuce, avocado, and Greek yogurt. Serve immediately.
Tips for best results
- Use a nonstick pan so you do not need extra oil.
- Add a splash of water if the taco seasoning sticks before the turkey is coated.
- Keep the lettuce cold and add it after cooking for better texture.
- Use chunky salsa if you want more texture in the bowl.
Easy swaps and variations
- Swap ground turkey for lean ground chicken.
- Use cauliflower-free slaw mix instead of lettuce for extra crunch.
- Replace rice with a small tortilla cut into strips.
- Add pickled jalapeños if you like heat.
Storage and meal-prep notes
- Fridge: Store the cooked turkey mixture for up to 3 days.
- Freezer: Freeze only the turkey, rice, beans, corn, and salsa mixture for up to 2 months.
- Reheat: Microwave the warm filling for 90 seconds, stir, then heat for another 30–45 seconds if needed. Add fresh toppings after reheating.
What to serve with it
Serve with extra lettuce, cucumber sticks, or a spoon of extra salsa. Avoid adding chips if you want to keep the meal close to 400 kcal.
Nutrition estimate
- Total kcal: 386 kcal
- Kcal per serving: 386 kcal
- Rough protein: 28 g
- Rough carbs: 39 g
- Rough fat: 13 g
Nutrition values are estimates and may vary depending on turkey leanness, salsa, and rice brand.
Recipe 3: Creamy Tomato Chicken Tortellini Soup
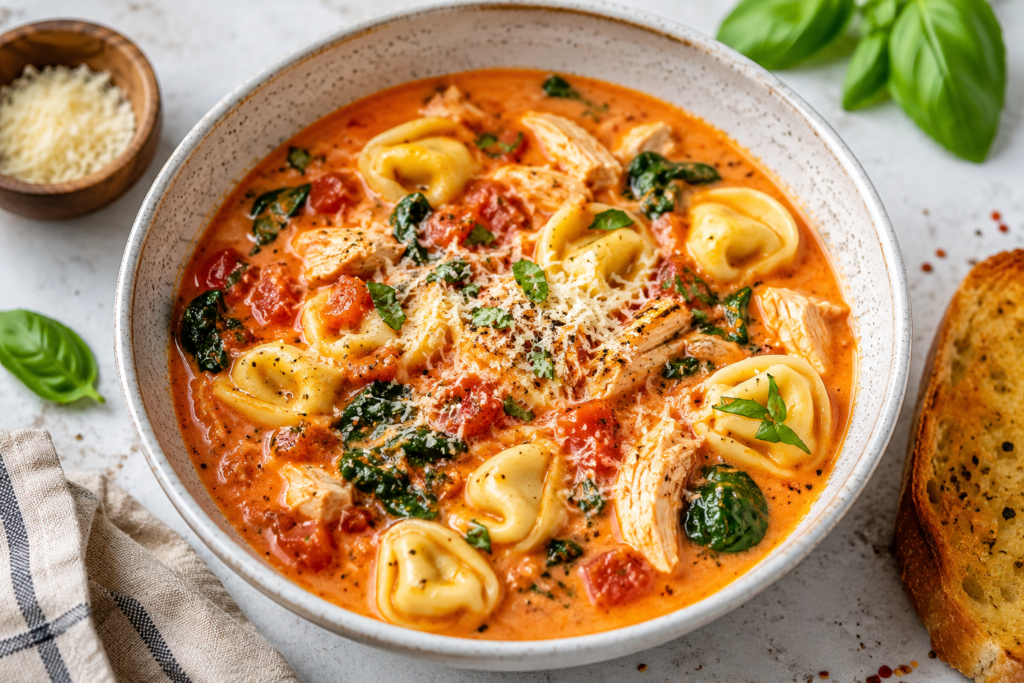
This is comfort food in a small, practical portion. The tortellini makes it feel cozy, while chicken and spinach help turn it into a complete dinner.
Recipe at a glance
- Prep time: 5 minutes
- Cook time: 12 minutes
- Total time: 17 minutes
- Servings: 1
- Estimated kcal per serving: 383 kcal
Ingredients
| Ingredient | Metric quantity | Imperial quantity | Estimated kcal for listed amount | Notes / swaps |
|---|---|---|---|---|
| Fresh cheese tortellini | 70 g | 2.5 oz | 190 kcal | Use refrigerated tortellini |
| Cooked chicken breast, shredded | 50 g | 1.8 oz | 83 kcal | Rotisserie chicken works |
| Tomato passata | 150 g | 2/3 cup | 45 kcal | Crushed tomatoes also work |
| Low-sodium chicken broth | 240 ml | 1 cup | 5 kcal | Use vegetable broth if needed |
| Baby spinach | 50 g | 2 cups loosely packed | 12 kcal | Add at the end |
| Light cream cheese | 15 g | 1 tbsp | 33 kcal | Makes the soup creamy |
| Parmesan, finely grated | 3 g | 1 tsp | 13 kcal | Optional but flavorful |
| Garlic powder, basil, black pepper | 1 g | 1/4 tsp total | 2 kcal | Adjust to taste |
Total estimated kcal for the whole recipe: 383 kcal
Estimated kcal per serving: 383 kcal
Equipment needed
- Small saucepan
- Spoon
- Measuring cup
- Bowl
How to make it
- Pour the broth and tomato passata into a small saucepan. Place it over medium heat.
- Season with garlic powder, basil, and black pepper. Stir for 30 seconds to combine.
- Bring the soup to a gentle simmer. Small bubbles should appear around the edges after 3–4 minutes.
- Add the tortellini and stir so the pasta does not stick to the bottom. Simmer for 5–6 minutes, or until the tortellini floats and feels tender when pressed with a spoon.
- Add the shredded chicken and simmer for 1–2 minutes, until the chicken is hot.
- Reduce the heat to low. Stir in the light cream cheese until the soup looks smooth and lightly creamy.
- Add the spinach and stir for 30–60 seconds, until the leaves wilt and turn bright green.
- Serve in a bowl and finish with the grated Parmesan.
Tips for best results
- Keep the soup at a simmer, not a hard boil, so the tortellini stays tender.
- Use finely grated Parmesan so a small amount adds more flavor.
- Stir the cream cheese in on low heat to prevent small lumps.
- Add spinach last so it keeps a fresh color.
Easy swaps and variations
- Swap chicken for turkey breast if you have leftovers.
- Use mini tortellini if you want more pieces per spoonful.
- Add chili flakes for a warmer flavor.
- Use a spoon of plain Greek yogurt instead of cream cheese, but stir it in off the heat.
Storage and meal-prep notes
- Fridge: Store for up to 2 days. The tortellini will absorb some liquid.
- Freezer: Not ideal because the pasta can become soft.
- Reheat: Warm gently on the stovetop over low heat for 4–5 minutes. Add a splash of broth if it has thickened.
What to serve with it
Serve with a simple side salad or cucumber slices. Skip bread or use a very small piece if you want to stay near 400 kcal.
Nutrition estimate
- Total kcal: 383 kcal
- Kcal per serving: 383 kcal
- Rough protein: 26 g
- Rough carbs: 40 g
- Rough fat: 12 g
Nutrition values are estimates and may vary depending on tortellini brand, chicken, and cream cheese.
Recipe 4: Tuna White Bean Melt Wrap
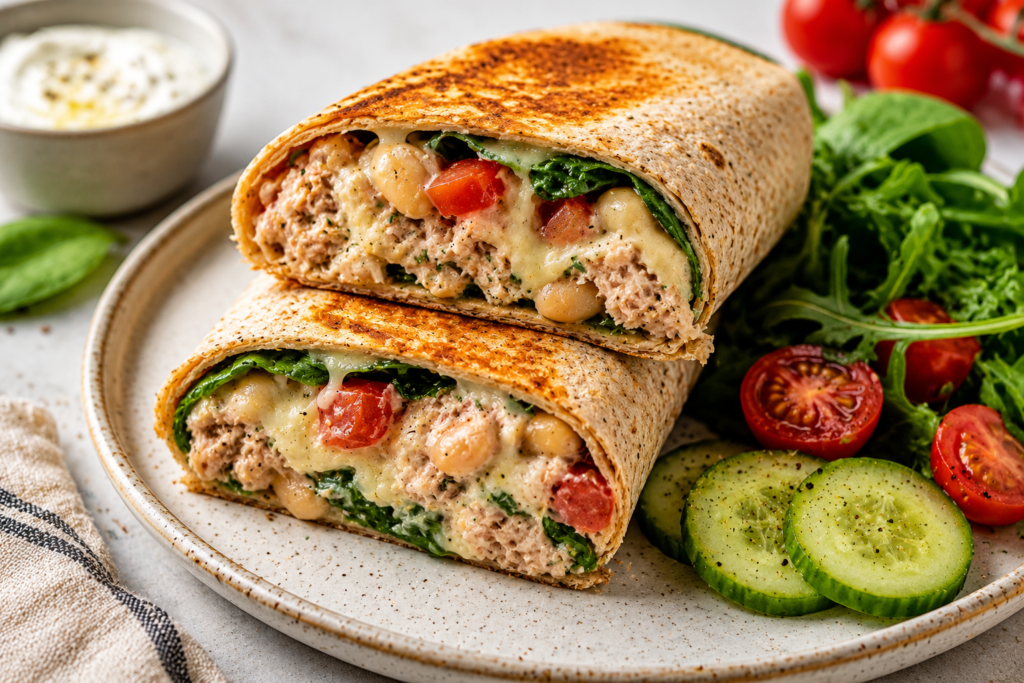
This is a fast dinner for nights when you want something warm but do not want to cook a full meal. The tuna and white beans make it filling, while the melted cheese makes it feel more like comfort food.
Recipe at a glance
- Prep time: 7 minutes
- Cook time: 6 minutes
- Total time: 13 minutes
- Servings: 1
- Estimated kcal per serving: 356 kcal
Ingredients
| Ingredient | Metric quantity | Imperial quantity | Estimated kcal for listed amount | Notes / swaps |
|---|---|---|---|---|
| Whole wheat tortilla | 40 g | 1 medium tortilla | 120 kcal | Choose a soft wrap |
| Tuna in water, drained | 90 g | 3.2 oz | 99 kcal | Use well-drained tuna |
| White beans, drained and rinsed | 40 g | 3 tbsp | 45 kcal | Mash lightly for creaminess |
| Light mozzarella, shredded | 25 g | 1/4 cup | 62 kcal | Helps the wrap hold together |
| Plain Greek yogurt | 25 g | 1.5 tbsp | 15 kcal | Replaces mayo |
| Tomato, thinly sliced | 50 g | 1/2 small tomato | 9 kcal | Pat dry if very juicy |
| Baby spinach | 20 g | 1 small handful | 5 kcal | Optional but useful |
| Dijon mustard | 5 g | 1 tsp | 1 kcal | Adds sharpness |
| Lemon juice, black pepper | 5 ml + pinch | 1 tsp + pinch | 0 kcal | For freshness |
Total estimated kcal for the whole recipe: 356 kcal
Estimated kcal per serving: 356 kcal
Equipment needed
- Bowl
- Fork
- Nonstick skillet
- Spatula
- Knife
How to make it
- Add the tuna, white beans, Greek yogurt, Dijon mustard, lemon juice, and black pepper to a bowl.
- Mash the mixture with a fork for 30–45 seconds, until the beans are slightly crushed and the tuna looks lightly creamy.
- Lay the tortilla flat on a clean surface. Add spinach, tomato slices, the tuna mixture, and shredded mozzarella.
- Fold the sides of the tortilla inward, then roll it tightly from the bottom to close the wrap.
- Heat a nonstick skillet over medium-low heat for 1 minute.
- Place the wrap seam-side down in the skillet. Cook for 2–3 minutes, until the bottom is golden and sealed.
- Flip the wrap carefully with a spatula and cook for another 2–3 minutes, until the second side is golden and the cheese has melted.
- Rest for 1 minute before slicing, so the filling stays inside. Serve warm.
Tips for best results
- Drain the tuna well so the wrap does not become soggy.
- Mash the beans lightly, not fully, for the best texture.
- Cook over medium-low heat so the tortilla browns before it burns.
- Rest the wrap before cutting for a cleaner slice.
Easy swaps and variations
- Swap mozzarella for reduced-fat cheddar.
- Use canned salmon instead of tuna.
- Add pickles or capers for a sharper flavor.
- Use arugula instead of spinach.
Storage and meal-prep notes
- Fridge: Store the tuna filling separately for up to 2 days.
- Freezer: Not recommended.
- Reheat: Assemble fresh, then toast in a skillet. A fully cooked wrap can be reheated in a dry skillet for 2–3 minutes per side.
What to serve with it
Serve with cucumber sticks, cherry tomatoes, or a small side salad. Keep sauces light because the wrap already has a creamy filling.
Nutrition estimate
- Total kcal: 356 kcal
- Kcal per serving: 356 kcal
- Rough protein: 34 g
- Rough carbs: 35 g
- Rough fat: 9 g
Nutrition values are estimates and may vary depending on tortilla, tuna, and cheese brand.
Recipe 5: Salmon Cucumber Sushi Bowl
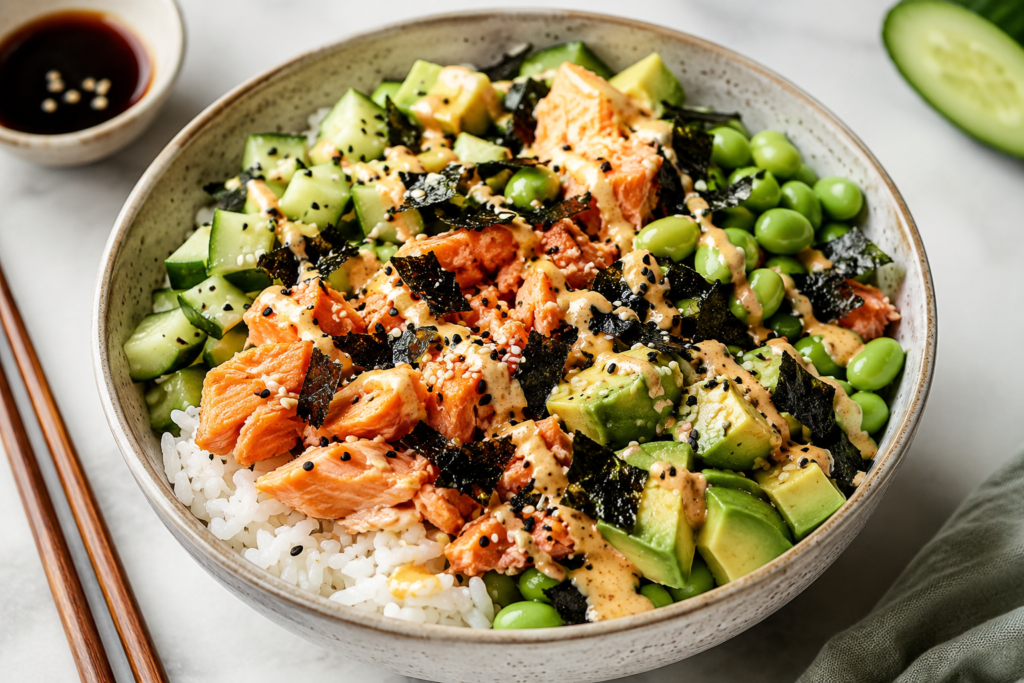
This bowl gives you sushi-inspired flavor without rolling anything. It is cool, creamy, salty, and filling, with pantry-friendly canned salmon and quick microwave rice.
Recipe at a glance
- Prep time: 8 minutes
- Cook time: 2 minutes
- Total time: 10 minutes
- Servings: 1
- Estimated kcal per serving: 361 kcal
Ingredients
| Ingredient | Metric quantity | Imperial quantity | Estimated kcal for listed amount | Notes / swaps |
|---|---|---|---|---|
| Cooked rice | 75 g | 1/2 cup loosely packed | 98 kcal | Warm microwave rice works |
| Canned salmon, drained | 75 g | 2.6 oz | 113 kcal | Use boneless if preferred |
| Shelled edamame | 40 g | 1/4 cup | 49 kcal | Use thawed frozen edamame |
| Cucumber, diced | 80 g | 1/2 cup | 12 kcal | Adds freshness |
| Avocado | 20 g | 1.5 tbsp diced | 32 kcal | Keep portion measured |
| Light mayonnaise | 8 g | 1.5 tsp | 28 kcal | Mix with sriracha |
| Soy sauce | 10 ml | 2 tsp | 8 kcal | Use low-sodium if desired |
| Sriracha | 5 g | 1 tsp | 3 kcal | Optional |
| Nori sheet, torn | 2 g | 1/2 sheet | 5 kcal | Adds sushi flavor |
| Sesame seeds | 2 g | 1/2 tsp | 11 kcal | Optional topping |
| Rice vinegar | 5 ml | 1 tsp | 2 kcal | Brightens the rice |
Total estimated kcal for the whole recipe: 361 kcal
Estimated kcal per serving: 361 kcal
Equipment needed
- Microwave
- Bowl
- Fork
- Knife
- Small spoon
How to make it
- Warm the cooked rice in a microwave-safe bowl for 60–90 seconds, until hot and soft.
- Stir the rice vinegar into the warm rice so it tastes lightly seasoned.
- Flake the drained salmon with a fork in a small bowl. Remove any large bones if you prefer a smoother texture.
- Mix the light mayonnaise with sriracha until smooth. Stir this into the salmon.
- Add the cucumber, edamame, avocado, and salmon mixture on top of the rice.
- Drizzle with soy sauce and sprinkle with torn nori and sesame seeds.
- Serve immediately, mixing the bowl just before eating.
Tips for best results
- Use warm rice with cool toppings for the best contrast.
- Drain the salmon well so the bowl does not become watery.
- Tear the nori right before serving so it stays crisp.
- Measure the avocado and mayo because they can increase calories quickly.
Easy swaps and variations
- Swap canned salmon for tuna or cooked shrimp.
- Use brown rice if you prefer a chewier texture.
- Add shredded carrots for more color.
- Use Greek yogurt instead of light mayo for a tangier sauce.
Storage and meal-prep notes
- Fridge: Store the rice, salmon, and toppings separately for up to 2 days.
- Freezer: Not recommended after assembly.
- Reheat: Warm only the rice, then add cold toppings fresh.
What to serve with it
Serve with extra cucumber, a small miso-style broth, or a side of shredded lettuce. Keep extra sauces measured to stay near 400 kcal.
Nutrition estimate
- Total kcal: 361 kcal
- Kcal per serving: 361 kcal
- Rough protein: 25 g
- Rough carbs: 33 g
- Rough fat: 14 g
Nutrition values are estimates and may vary depending on salmon, rice, mayonnaise, and toppings.
Recipe 6: Egg and Veggie Fried Rice
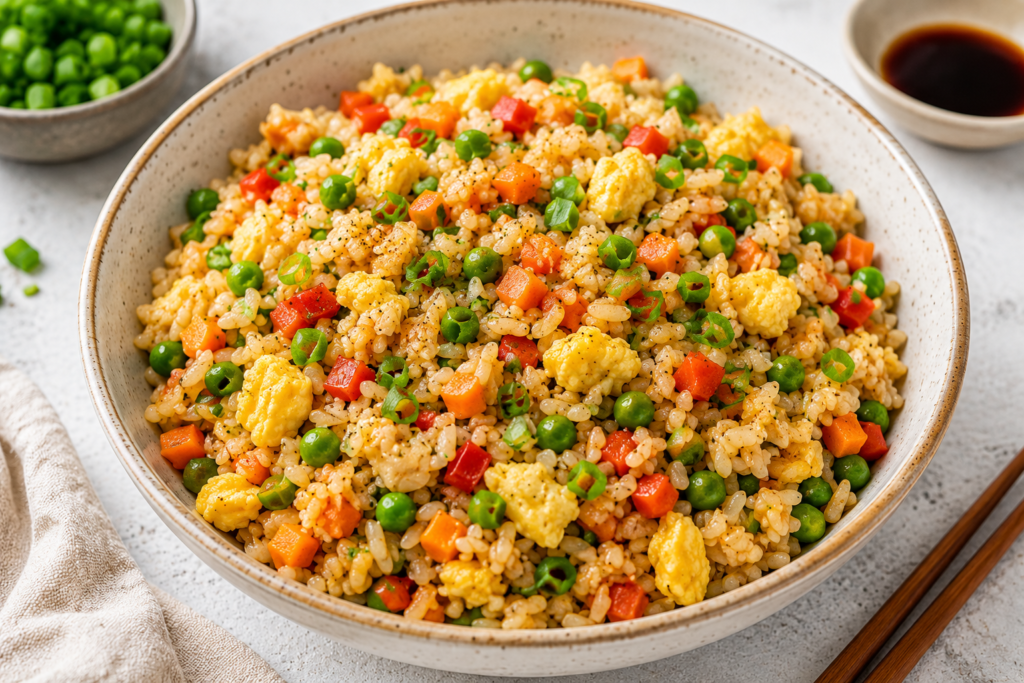
This is a practical dinner when you have leftover rice and a bag of frozen vegetables. It is warm, fast, and satisfying, with enough protein from eggs to feel like a real meal.
Recipe at a glance
- Prep time: 6 minutes
- Cook time: 9 minutes
- Total time: 15 minutes
- Servings: 1
- Estimated kcal per serving: 397 kcal
Ingredients
| Ingredient | Metric quantity | Imperial quantity | Estimated kcal for listed amount | Notes / swaps |
|---|---|---|---|---|
| Cooked rice, chilled if possible | 100 g | 2/3 cup | 130 kcal | Leftover rice works best |
| Eggs | 2 large | 2 large | 144 kcal | Beat before cooking |
| Frozen peas and carrots | 120 g | 1 cup | 78 kcal | No chopping needed |
| Soy sauce | 10 ml | 2 tsp | 8 kcal | Low-sodium works |
| Sesame oil | 3 g | 3/4 tsp | 27 kcal | Use a small measured amount |
| Spring onion, sliced | 15 g | 2 tbsp | 5 kcal | Optional but fresh |
| Garlic, minced | 3 g | 1 small clove | 4 kcal | Garlic powder also works |
| Ginger, grated or powdered | 1 g | 1/4 tsp | 1 kcal | Optional |
Total estimated kcal for the whole recipe: 397 kcal
Estimated kcal per serving: 397 kcal
Equipment needed
- Nonstick skillet
- Spatula
- Small bowl
- Fork
- Measuring spoon
How to make it
- Beat the eggs in a small bowl with a fork until the yolks and whites are fully mixed.
- Heat a nonstick skillet over medium heat for 1 minute. Add the sesame oil and tilt the pan to spread it.
- Pour in the beaten eggs. Stir gently for 1–2 minutes, until soft curds form and no liquid egg remains.
- Transfer the scrambled eggs to a plate. Keep the skillet on medium heat.
- Add the frozen peas and carrots to the skillet. Cook for 3–4 minutes, stirring often, until hot and no icy pieces remain.
- Add the garlic and ginger. Stir for 30 seconds, until fragrant.
- Add the cooked rice and break up any clumps with the spatula. Cook for 2 minutes, stirring often, until the rice is hot.
- Return the eggs to the skillet and drizzle in the soy sauce. Stir for 30–60 seconds, until everything is evenly coated.
- Top with spring onion and serve hot.
Tips for best results
- Use cold cooked rice if possible because it fries better.
- Keep the heat at medium so the egg stays tender.
- Break up rice clumps before adding soy sauce.
- Measure the sesame oil because a little gives plenty of flavor.
Easy swaps and variations
- Add cooked chicken breast if you want more protein, but reduce the rice slightly to stay near 400 kcal.
- Use frozen mixed vegetables if you do not have peas and carrots.
- Add chili flakes or sriracha for heat.
- Swap soy sauce for tamari if needed.
Storage and meal-prep notes
- Fridge: Store leftovers for up to 2 days in an airtight container.
- Freezer: Not ideal because the egg texture can change.
- Reheat: Microwave for 90 seconds, stir, then heat for another 30 seconds until steaming.
What to serve with it
Serve with sliced cucumber, lettuce leaves, or a small side of tomatoes. Avoid adding extra oil-based sauces if you want to keep it close to 400 kcal.
Nutrition estimate
- Total kcal: 397 kcal
- Kcal per serving: 397 kcal
- Rough protein: 18 g
- Rough carbs: 47 g
- Rough fat: 15 g
Nutrition values are estimates and may vary depending on rice, egg size, and vegetable mix.
Recipe 7: Shrimp Fajita Flatbread
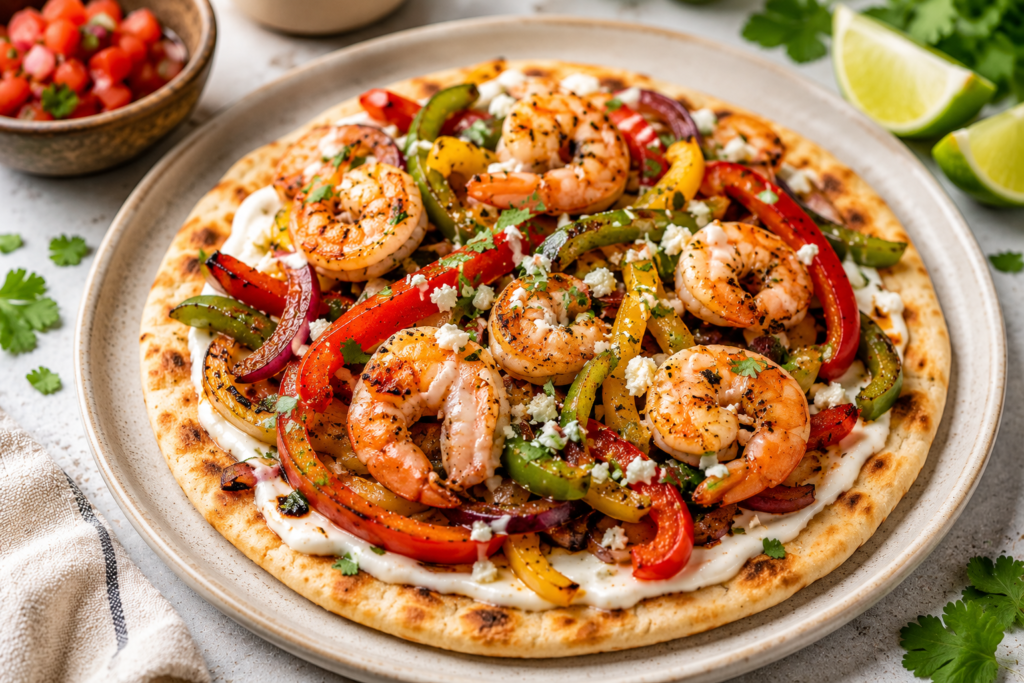
This flatbread feels like a fun dinner, but it comes together quickly in one pan. Shrimp cooks fast, the vegetables add color, and the yogurt-salsa topping keeps it fresh.
Recipe at a glance
- Prep time: 8 minutes
- Cook time: 10 minutes
- Total time: 18 minutes
- Servings: 1
- Estimated kcal per serving: 355 kcal
Ingredients
| Ingredient | Metric quantity | Imperial quantity | Estimated kcal for listed amount | Notes / swaps |
|---|---|---|---|---|
| Small flatbread or tortilla | 40 g | 1 small flatbread | 120 kcal | Choose a thin flatbread |
| Raw shrimp, peeled | 110 g | 4 oz | 110 kcal | Thaw before cooking |
| Bell pepper, sliced | 100 g | 1 cup | 31 kcal | Any color works |
| Red onion, sliced | 50 g | 1/2 small onion | 19 kcal | Slice thinly |
| Reduced-fat shredded cheese | 12 g | 2 tbsp | 48 kcal | Cheddar or mozzarella |
| Plain Greek yogurt | 25 g | 1.5 tbsp | 15 kcal | For topping |
| Salsa | 40 g | 2.5 tbsp | 15 kcal | Spoon on after cooking |
| Fajita seasoning | 4 g | 1.5 tsp | 7 kcal | Use low-sodium if preferred |
| Oil spray | 1 second spray | 1 second spray | 0 kcal | Use a nonstick pan |
| Lime juice | 5 ml | 1 tsp | 0 kcal | Optional finish |
Total estimated kcal for the whole recipe: 355 kcal
Estimated kcal per serving: 355 kcal
Equipment needed
- Nonstick skillet
- Spatula
- Baking tray or air fryer basket
- Knife
- Cutting board
How to make it
- Preheat the oven to 200°C / 400°F, or set an air fryer to 190°C / 375°F.
- Pat the shrimp dry with paper towel so they sear instead of steaming.
- Heat a nonstick skillet over medium heat for 1 minute and coat it lightly with oil spray.
- Add the bell pepper and onion. Cook for 4–5 minutes, stirring often, until the vegetables soften and the onion edges look lightly golden.
- Add the shrimp and fajita seasoning. Cook for 2–3 minutes, flipping the shrimp once, until they turn pink and opaque.
- Place the flatbread on a baking tray or in the air fryer basket. Add the shrimp and vegetables evenly on top.
- Sprinkle with reduced-fat cheese. Bake for 3–4 minutes, or air fry for 2–3 minutes, until the cheese melts and the flatbread edges look lightly crisp.
- Top with salsa, Greek yogurt, and lime juice. Serve immediately.
Tips for best results
- Dry the shrimp before cooking for better texture.
- Slice the vegetables thinly so they soften quickly.
- Add salsa after baking so the flatbread does not become soggy.
- Watch the flatbread closely because thin ones crisp fast.
Easy swaps and variations
- Swap shrimp for cooked chicken strips.
- Use a small tortilla if you do not have flatbread.
- Add lettuce after baking for extra volume.
- Use Greek yogurt mixed with lime and garlic powder as a quick sauce.
Storage and meal-prep notes
- Fridge: Store cooked shrimp and vegetables for up to 2 days.
- Freezer: Not recommended after assembly.
- Reheat: Reheat the shrimp and vegetables in a skillet for 2–3 minutes, then assemble and crisp the flatbread fresh.
What to serve with it
Serve with shredded lettuce, cucumber sticks, or a small tomato salad. Keep extra cheese and sauces measured if staying near 400 kcal.
Nutrition estimate
- Total kcal: 355 kcal
- Kcal per serving: 355 kcal
- Rough protein: 32 g
- Rough carbs: 36 g
- Rough fat: 8 g
Nutrition values are estimates and may vary depending on flatbread, shrimp size, cheese, and salsa brand.
Final practical takeaway
For the fastest dinner, choose the rotisserie chicken rice bowl or salmon sushi bowl. For something warm and cozy, make the tortellini soup or egg fried rice. For a more fun, takeout-style plate, try the turkey taco bowl, tuna melt wrap, or shrimp fajita flatbread.
Can dinner under 400 calories still be filling?
Yes, it can be filling when the meal includes protein, fiber, volume, and flavor. These recipes use ingredients like chicken, turkey, tuna, salmon, eggs, shrimp, beans, vegetables, rice, and yogurt to make the portions feel more satisfying.
Are these lazy girl dinners good for meal prep?
Some are better for meal prep than others. The turkey taco skillet, tortellini soup, and fried rice can be made ahead and reheated. Bowls and wraps are best when components are stored separately and assembled fresh.
Can I make these dinners higher in protein?
Yes. Add a little more chicken, turkey, tuna, salmon, shrimp, egg whites, or Greek yogurt. To keep the meal close to 400 kcal, reduce a higher-calorie ingredient such as rice, cheese, avocado, tortilla, or mayo.
Are the calorie counts exact?
No. The calorie counts are estimates. They can change depending on brands, cooking methods, exact weights, and portion sizes. For the most accurate numbers, weigh your ingredients and use the nutrition labels on your products.
What is the easiest dinner in this list?
The Lemon Garlic Rotisserie Chicken Rice Bowl is the easiest if you already have cooked chicken and rice. It takes about 10 minutes and only needs warming, chopping, seasoning, and assembling.
Can I use these recipes for weight loss?
You can use them as part of a balanced calorie-conscious routine, but no single recipe causes weight loss on its own. They are designed to make dinner easier to portion and plan, especially on busy weeknights.